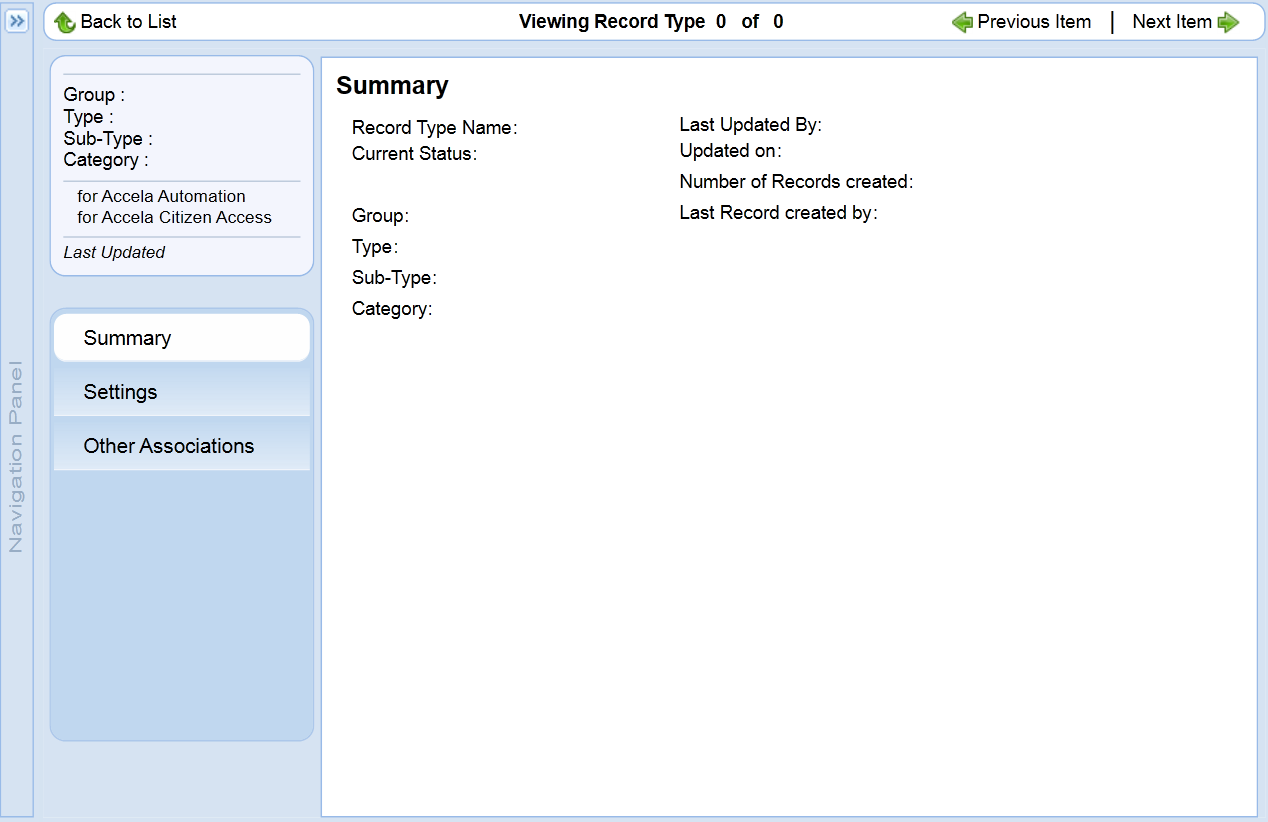
Configure record type settings
After defining the basic configuration for a record type, you can complete the record type settings. These configurations include settings for Citizen Access, Audit Frequency, and Accela GIS Settings. For an brief overview of the Record Type Settings page, see “Configuring Record Type Settings” in the Accela Civic Platform Administrator Guide.
To configure the Settings portlet
-
Navigate to the Record type administration screen in Civic Platform administration.
-
Expand a module to search and select the record type you want to work with. For instructions on how to search for a record type, see “Searching for Record Types” in the Accela Civic Platform Administrator Guide.
-
Select the Setting tab from the summary panel.
-
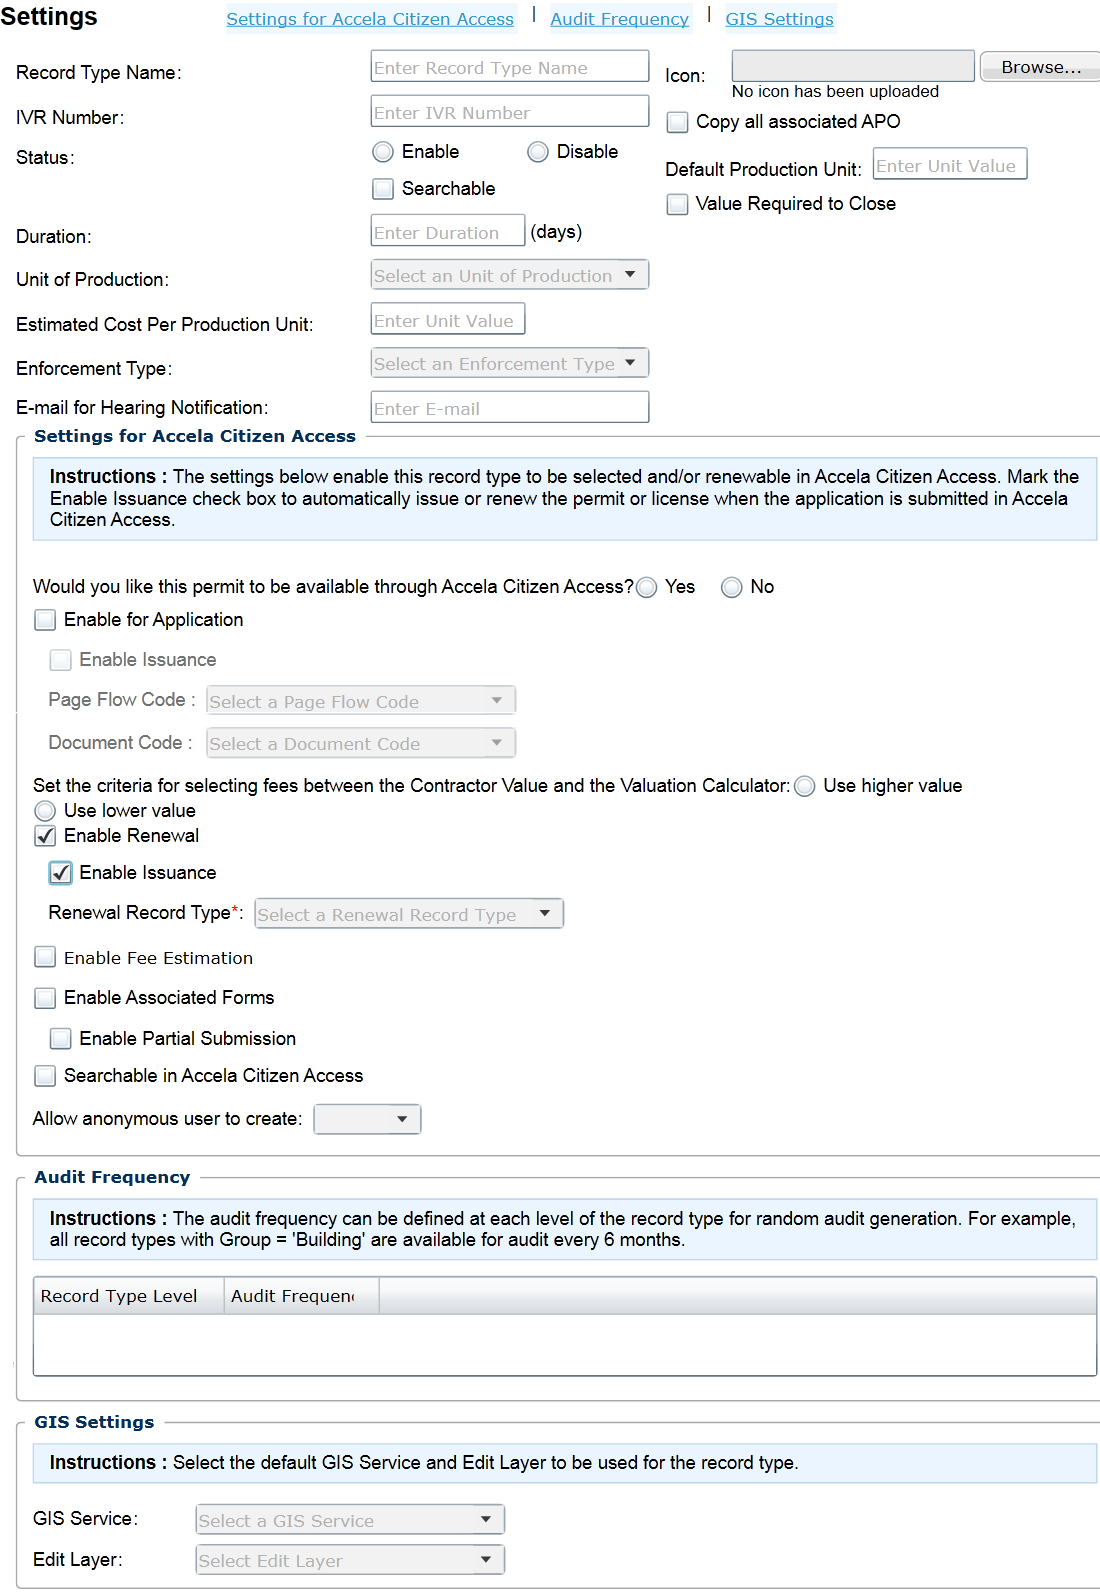
Complete the Settings section and the Settings for Citizen Access section. For additional information, see Record type settings field descriptions.
If necessary, complete the Audit Frequency section and Accela GIS Settings section.
-
Select Save.
Record type settings field descriptions
| Section on page | Field name | Field description |
|---|---|---|
|
Settings for any module |
Record type name |
Enter an alias name for the record type to display in the Record list portlet. This name replaces the four level name for the record type. |
|
Settings for any module |
Duration |
Enter the number of days you estimate the record should take to complete. For more information, see “Setting Up an Estimated Application Due Date” in the Accela Civic Platform Administrator Guide. |
|
Settings for any module |
Icon |
Select the Browse button to search and select the image you want associated with the record type. For more information, see “Configuring a Display Image Attachment” in the Accela Civic Platform Administrator Guide. |
|
Settings for any module |
IVR number |
Enter the associated interactive voice response (IVR) number for the record type. For more information about the IVR Number, refer to the Accela IVR Administrator Guide. or the Accela IVR Installation Guide. |
|
Settings for any module |
Status |
Select Enable or Disable. You can choose to Disable a record type to prevent users from creating this type of record. The Disable option does not remove the record type. All application types with the Enable status are searchable. If you disable an application type, you can select the Searchable check box below the status options, to allow users to search records with the disabled yet searchable record type. |
|
Settings for asset module |
Default production unit |
Enter a fixed production quantity for a work order. |
|
Settings for asset module |
Estimated cost per production unit |
Enter a value to be used to generate the estimated cost for each work order. The functionality is particularly useful when Accela Asset management users record the estimated cost per production unit. |
|
Settings for asset module |
Unit of production |
Use the list to select the unit of measure for production units for the record type for Accela Asset management. For example, Each, Feet, Acres, or Miles. |
|
Settings for asset module |
Value required to close |
Select the check box to indicate the Production quantity field is required before closing a work order in Accela Asset management. |
|
Settings for enforcement module |
Email for hearing notification |
Enter the email address used to send email notifications for hearings. |
|
Settings for enforcement module |
Enforcement type |
Enter the enforcement type in this field. For example, Abatement. |
|
Settings for Citizen Access |
Enable associated forms |
Select this check box to display the associated forms step to the record creation process. Use the associated forms step to display and manage child records for the parent record during the parent record creation. For more information about creating parent and child records, see Variations for creating records. Selecting this check box also activates the Enable partial submission check box. Enable partial submission. Select this check box to enable public users to continue the application intake process without completing all available associated forms. |
|
Settings for Citizen Access |
Enable application |
This field shows only if the FID of 0075 is enabled. Select the Enable application check box to make the record type available in Citizen Access. Only if the Enable application check box is selected, is the record type is available in Citizen Access. The record type cannot be automatically issued through Citizen Access, it needs agency’s approval. This check box also flags Civic Platform to display the Record Type Alias in Citizen Access. Also Enable Issuance: Select this check box if you want to automatically approve and issue the record type through Citizen Accesswhen fees are paid in full. |
|
Settings for Citizen Access |
Enable fee estimation |
This field shows only if the FID - 0075 is enabled. Select this check box if you want to allow users to create a partial application that includes a calculation of estimated fees. This fee estimation is dependent on the Fee Schedule. |
|
Settings for Citizen Access |
Enable renewal |
Select the Enable renewal check box if you want to enable the renewal of licenses in Citizen Access for this record type. Select this check box to activate the Enable issuance check box for this renewal, and the Renewal record type list. Administrators must define a renewal record type relating to this renewal process. Enable issuance: Select the Enable issuance check box for renewals if you want to provide the service “Issuance Online”. It also provides the ability to have the License or Permits status change back to Active when a public user completes the renewal application. Choose a Renewal record type from the list to designate the renewal record type for the expired record. For example, choose a Renewal Plumber Permit for the expired plumbing permit. |
|
Settings for Citizen Access |
Document code |
Indicate the document code set for the types of documents public users can upload and attach to record types in Citizen Access. This field is visible only if administrators set the function identification (FID) numbers 0108 Admin document type and 0065 Admin application types to full access. |
|
Settings for Citizen Access |
Page flow code |
Use this list to associate a page flow code to this record type. The page flow code you choose is reflected within ACA admin. You can create and assign the default setting for this field in ACA Admin page flow configuration. For more information about page flows, see Page flow. |
|
Settings for Citizen Access |
Set the criteria for selecting fees between the Contractor Value and the Valuation Calculator. |
To set the fee valuation associated with the record, you can choose to use the higher value or the lower value that is calculated between the contractor value and the valuation calculator. |
|
Settings for Citizen Access |
Searchable in Citizen Access |
Select the check box to indicate the records of the selected record type can be searched in Citizen Access. |
|
Settings for Citizen Access |
Allow anonymous users to create |
This option and the Force Registration/Login setting jointly determine whether anonymous users can create records of specific record types in Citizen Access, or through deep links. For more information, see Settings on creating records by anonymous usersActivate the search for provider/education option |
|
Settings for Citizen Access |
Would you like this permit to be available through Citizen Access? |
This field shows only if FID - 0075 is disabled. You can either select Yes to make the record type available in Citizen Access, or select No to prevent the record type being available from Citizen Access. |
|
Audit frequency |
Audit frequency |
Enter the number of months in the Audit frequency column to designate the interval between audits for the record type. You can enter a number under any of the record type levels. For example, enter a 3 next to the Building Permit Record Type Level to prevent Building Permit Records from auditing within a three month period. When you edit any level of a record type, Civic Platform automatically syncs the audit frequency for all related Record Types. For example, if you modify the audit frequency for Building to 18 months for Building/Commercial/Addition/Apt +5, the audit frequency for Building/Commercial/Addition/Amusement also changes to 18 months. |
Configure other associations
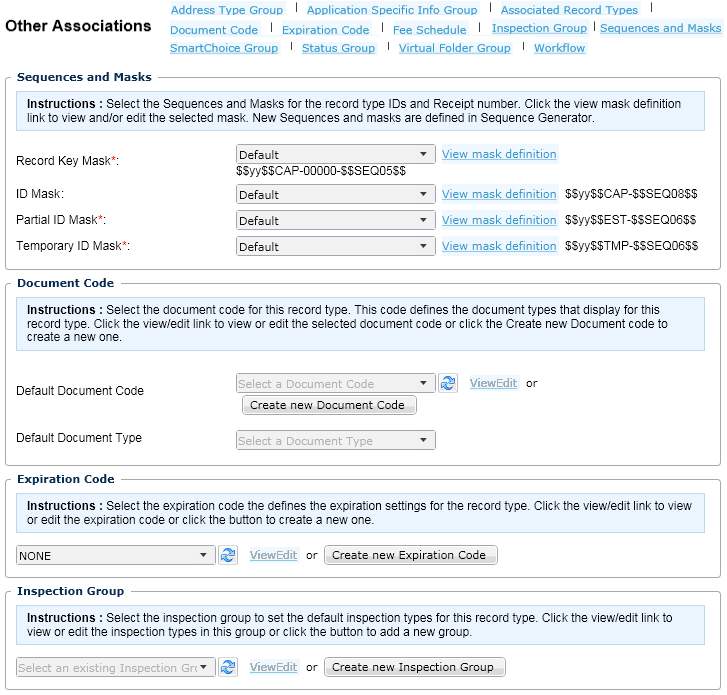
After defining the basic configuration and the settings for a record type, you can complete the other associations of the record type. These configurations include: Address Type Group, Application Specific Info Group, Associated Record Types, Document Code, Expiration Code, Fee Schedule, Inspection Group, Sequences and Masks, SmartChoice Groups, Status Group, and Workflow. Agency administrators may have defined some of these configurations in the basic record type setup, but you can modify the configuration if you have permissions to do so. Also, you can use this record type other associations portlet to create new codes or groups and assign them to the record type if you have permissions to do so. For an overview of the format for the Other Associations page, see the “Record Types” chapter in the Accela Civic Platform Administrator Guide.
To configure the other associations portlet
-
Navigate to the Record type administration portlet.
-
Expand a module to search and select the record type you want to configure.
-
Select the Other associations tab from the summary panel.
-
Complete the Other association fields as described in Record Type Other Association Fields.
-
If necessary, complete the Sequences and Masks section. This section has required fields.
-
If necessary, complete the Document Code section.
-
If necessary, complete the Expiration Code section.
-
If necessary, complete the Inspection Group section.
-
If necessary, complete the Address Type Group section.
-
If necessary, complete the Fee Schedule section. This section has a required field.
-
If necessary, complete the Workflow section. This section has a required field.
-
If necessary, complete the SmartChoice Group section. This section has a required field.
-
If necessary, complete the Application Specific Info Group section.
-
If necessary, complete the Associated Record Types section.
-
-
Select Save.
Record Type Other Association Fields
| Section on page | Field name | Field description |
|---|---|---|
|
Sequences and masks |
ID Mask |
Select the mask for the application type. Users can click the ID Mask Definition link to read the pattern and definition of ID masks. Within the pop-up window you can also click the Guide button to review the recommended mask patterns and the examples. For instructions on creating a mask, see “Editing a Mask” in the Accela Civic Platform Administrator Guide. For more information on managing sequences and using the Sequence Generator tool, see the “Sequence Generator” chapter in the Accela Civic Platform Administrator Guide. |
|
Sequences and masks |
Invoice number scheme |
From the list, choose the invoice number format for the record type. You format an invoice number scheme by creating a mask. For an example on formatting a receipt number scheme or mask, see “Setting Up a Sequence and Mask Definition” in the “Autonumbers” chapter in Accela Civic Platform Administrator Guide. Users can select the Select a invoice number scheme link to read the pattern and definition of the invoice in this list. For example, administrators may want to number invoices for the code enforcement department differently from invoices for the permit department. |
|
Sequences and masks |
Partial ID mask |
Use the list to search and select a Partial ID mask for identification of those records that are only partially complete at intake, records that represent an estimate, or records that were saved and resumed for later in Citizen Access. Partial ID mask is a required field. |
|
Sequences and masks |
Receipt number scheme |
From the list, choose the receipt number format for the record type. You format a receipt number scheme by creating a mask. For instructions on formatting a receipt number scheme, see “Editing a Mask” in the Accela Civic Platform Administrator Guide. Users can select the Receipt number definition link to read the pattern and definition of the receipt in this list. As an example, system administrators may want to group receipts for the building department separately from receipts for the code enforcement department. |
|
Sequences and masks |
Record key mask |
Use the list to search and select a record key mask, which identifies a record of this type in Civic Platform. You can also just use the default value: $$yy$$CAP-00000-$$SEQ05$$ by choosing Default from the list. Record key mask is a required field. |
|
Sequences and masks |
Temporary ID mask |
Use the list to search and select the mask used for the temporary ID mask for this record type. Temporary ID mask is a required field. |
|
Document code |
Default document code Default document type |
Use the menu to select an existing document code. You can view or edit this code by selecting the View/Edit link. If you want to create a new document code, select the Create new document code link. For detailed instructions on how to create a document code, see “Configuring Documents for Attachments” in the Accela Civic Platform Administrator Guide. Use the default document type to provide a label for type of document, such as a graphic image or photo, a drawing, or a Word document. |
|
Expiration code |
Expiration code |
Use the menu to select an existing expiration code. You can view or edit this code by selecting the View/Edit link. If you want to create a new expiration code, select the Create new expiration code link. For instructions on creating a new expiration code, see the list “Expiration Code Fields” in the Accela Civic Platform Administrator Guide. |
|
Inspection group |
Inspection group |
Use the menu to select an existing inspection code. You can view or edit this code by selecting the View/Edit link. If you want to create a new inspection group, select the Create new inspection group button. For instructions on creating a new inspection code, see “Managing Inspection Groups” in the Accela Civic Platform Administrator Guide. |
|
Address type group |
Address type group |
Use the menu to select an address type group you want to assign to the record type. For more information, see “Managing Address Type Groups” in the Accela Civic Platform Administrator Guide. |
|
Status group |
Application status group code |
Use the menu to select an existing Application status group code. You can view or edit this code by selecting the View/Edit link. If you want to create a new application status group, select the Create new status group button. For more information, see “Working with Application Status Groups” in the Accela Civic Platform Administrator Guide. |
|
Status group |
Default record status |
Use the drop-down menu to select the default record status you want to assign to the record type. For more information, see “Changing the Name or Default Status of a General Profile” in the Accela Civic Platform Administrator Guide. |
|
Fee schedule |
Fee schedule |
Use the menu to select an existing fee schedule. You can view or edit the Fee schedule code by selecting the View/Edit link. If you want to create a new fee schedule, select the Create new fee schedule button. Fee schedule is a required field. For more information about fee schedules, see “Managing Fee Schedules” in the “Fee Setup” chapter of the Accela Civic Platform Administrator Guide. |
|
Workflow |
Workflow |
Use the drop-down menu to select an existing Workflow. You can view or edit the Workflow code by clicking the View/Edit link. If you want to create a new Workflow, click the Create new Workflow button. Workflow is a required field. For more information about workflow, see “Managing Workflow Processes” in the Accela Civic Platform Administrator Guide. |
|
SmartChoice group |
SmartChoice group |
Use the menu to select an existing SmartChoice group. You can view or edit the SmartChoice Group code by selecting the View/Edit link. If you want to create a new SmartChoice Group, select the Create new SmartChoice group button. SmartChoice group is a required field. For more information about SmartChoice groups, see “Working with SmartChoice Groups” in the Accela Civic Platform Administrator Guide. |
|
Application specific info group |
Application specific info group |
Use the menu to select an existing application specific info group. You can view or edit the Application specific info group code by selecting the View/Edit link. If you want to create a new application specific info group, select the Create new application specific info button. For more information about application specific info groups, see “Application-Specific Information” in the Accela Civic Platform Administrator Guide. |
|
Associated record types |
No status Status group |
Select the No status link or select a status group link, you see a popup to associate a record type. For more information about associated record types, see “Associating Record Types” in the Accela Civic Platform Administrator Guide. Prior to associating record types, you must select the Enable cart check box and set the Payment transaction settings to Transaction per cart in Cart settings. For more information about cart settings, see “Cart Settings” topic in the Global Settings Configuration Page chapter. |