Add a report
Before you add a report to the report administration, you must add specific security parameters to the physical report. Accela-hosted and subscription customers must send each newly developed report to an Accela implementation specialist. Civic Platform adds the security parameters to the report and places it in the appropriate directory on the report server. You can access this directory from the Report link in the Report Manager administration setup. On-premise customers, refer to the Civic Platform On-Premise Administrator Supplement for steps on setting these parameters and placing the reports in the appropriate directory.
Civic Platform organizes reports within reports administration by category. You must identify the categories before adding reports to the report manager. These categories also display in the Reports page, so that users can easily find the reports they need.
You can create and manage online inspection reports in Mobile Office the same way as they create and manage reports in Civic Platform. The report manager provides a report category, Mobile Office reports. If you add reports into the report category, and configure the standard choice ENABLE_AMO_ONLINE_REPORT, the reports are accessible on Mobile Office devices.
When adding a report to the reports administration, you must specify the report process service such as Crystal, Oracle, Microsoft reporting, Accela report writer, RTF, or URL report. This identification sends the request to execute the appropriate report engine when a user runs a report. Depending on the report service, different formatting options are available including Adobe Acrobat (.pdf), Microsoft Excel (.xls), Rich Text Format (.rtf), and many others. A preview of each report is available from the Report detail form screen. Use the preview to confirm that the correct reporting engine launches and the correct report displays before moving on to additional setup and configuration steps.
You can save reports to an Electronic Document Management System (EDMS), except for client executable reports, which you cannot save to an EDMS. With the EDMS options in the Report detail form, you can set the report to automatically save to the EDMS and categorize the report into a document group. You can also save reports to specific objects such as record, parcel, workflow, and asset inspection.
You can assign a report to a default printer to automatically print when a user runs the report. When a user runs a report set to automatically print, they receive a notification message when their report prints.
After you add reports to the report manager, you can make them accessible to users in Civic Platform from the Reports page, other pages, and workflow tasks. There are also additional set up and configuration steps for reports that include; adding parameters and assigning permissions to user groups and modules. These options are available in the reports administration of report manager. For more information on these options, refer to the appropriate topics in this guide.
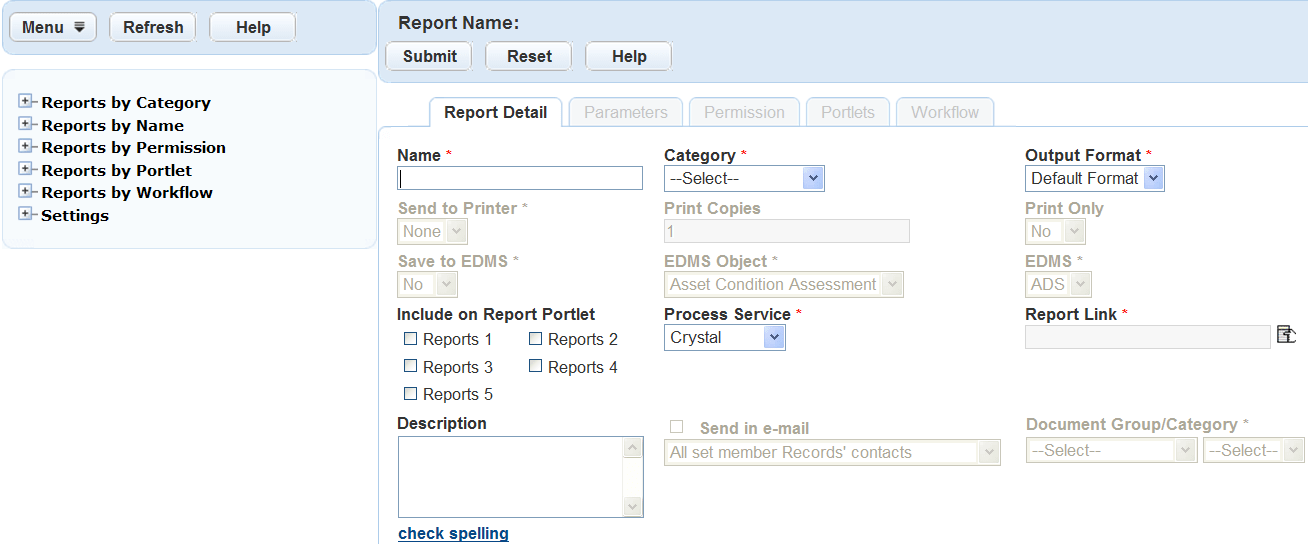
To add a report
-
From the Administration menu, select Report > Report manager.
-
From the Menu list, select New report or right-click a category or report in the navigation tree and select New report.
-
Complete the fields.
Field name Field description Authentication method Select the authentication method for the report service type.
This field displays only when you select the URL_Report process service. With other process services, Civic Platform configures this field when you set up the related report service.
Category Select the appropriate category for the report. Civic Platform uses this category to organize and display the report for the user in the Reports page or in form and list portlets. If you add a report to run in Mobile Office, select the Mobile office reports.
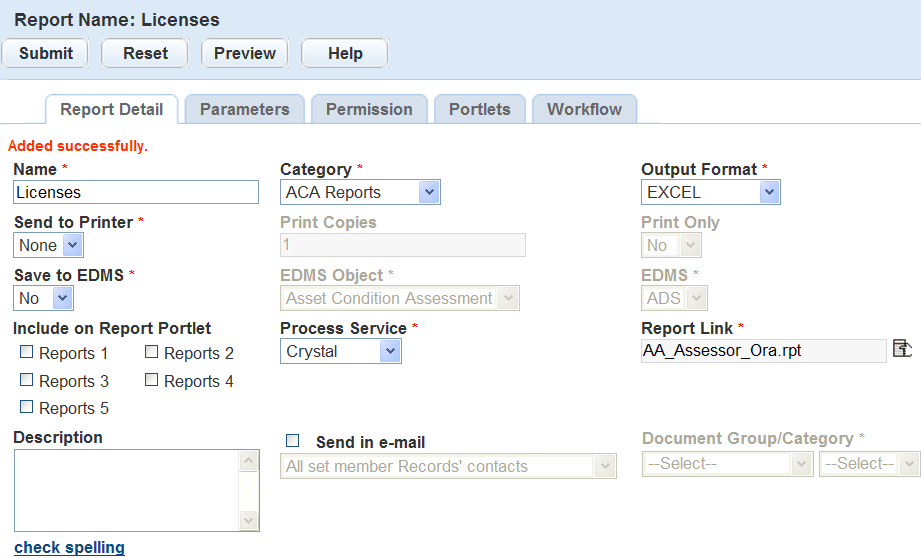
Description Enter a description of the report. For example, enter “The inspection list report displays the total number of inspections within a specific date range, ordered by inspection type.” Document group/category Categorize the report by first selecting a value from the Document group menu, then a value from the Category menu. It is important to select the Document group first, because the Category menu can be different, depending on which document group you choose. EDMS Select the Electronic Document Management System (EDMS) you want to save the report to. EDMS is available for all report services and types with the exception of client executables. EDMS object Select the Electronic Document Management System (EDMS) object you want to save the report to. When you save the report it displays under the Documents or Attachments tab for the associated object. Options include: record, parcel, workflow, asset condition assessment, inspection, reference contact, reference professional, and set. EDMS is available for all report services and types with the exception of client executables. If you select Record contact (or Record professional) as the EDMS object option, you can further select one or more contact types (or licensed professional types) in the Type selection box. When users run the report in a record, Civic Platform attaches the report to the contacts (or licensed professionals) of the selected types that are associated with the record. If none of the record contacts (or licensed professionals) are of the selected types, Civic Platform does not attach the report to any record contact (or licensed professionals). Name Enter the name you want to display for the report in the Reports page or Report menu. Output format Select the output format of the report. The options vary depending on the formats the report service supports. Options can include Adobe Acrobat (.pdf), Microsoft Word (.doc), Microsoft Excel (.xls), Rich Text Format (.rtf), and CSV comma-delimited (.csv). If you leave Output format blank or set it to default, Civic Platform uses the default viewer for the report service.
Tag reports in authorized service sales only supports PDF format. Mobile Office online reports do not support default format.
Print copies Enter the number of copies you can print. Print only Select Yes or No from this menu to indicate whether you want to print the report. Report link Select the Report link to choose the reports available in the report directory on the server. To expand the reports list, select Expand reportsfrom the menu. To contract the list to display a small list of reports, select Contract reports from the menu.
Because Mobile Office users can only run an online report on an inspection, the report you choose must include one and only one parameter for getting the inspection ID. The parameter for getting the inspection ID is already hard coded for Mobile Office online reports. You do not need to follow the instructions in Add, edit, or delete report parameters to add the parameter.
Reports portlet 1
Reports portlet 2
Reports portlet 3
Reports portlet 4
Reports portlet 5
Select the Reports portlet where you want the report to appear. A report can appear on more than one Reports screen. For instructions and information on where the Reports appear or how to make them visible, see Form designer and page layout. Reprint limit on Citizen Access If you are adding a license tag report for authorized service sales in Citizen Access, you must select the maximum number of reprint requests that an authorized agent or authorized agent's clerk can make.
This field displays when you set the Sent to printer option to Local DataMax-O’Neil E-Class Mark III Printer, and associate the report with the Print tag button (portlet name: Button - Citizen Access Print Tag).
You must configure the standard choice REPRINT_REASONS to define a list of possible reprint reasons for the authorized agent or clerk to select.
Password Enter the authentication password.
These fields display only when you select the URL_Report process service and choose the authentication method as basic authentication or NT authentication. With other process services, Civic Platform configures these fields when you set up the related report service. See .
Process service Select the report service to use for the specified report. The options selected in the menu filter the reports that display in the Report link window. The RTF and URL_Report options is always available. The other process service options are the report services you set up in .
If you select the URL_Report process service and then set the authentication method to Basic authentication or NT aAuthentication, users can run a report and have it open directly without a login prompt appearing. Civic Platform passes the authentication information to the report server. However, if the report opens in a web browser, users have view-only access, and any links within the report do not function.
Save to EDMS Select whether or not you want to save the report to the Electronic Document Management System (EDMS) specified in the Save to EDMS field. Select Yes to automatically save the report to EDMS. Select No to not save the report automatically to EDMS. Send in email This option is either active or inactive, based on the report format you select in the Output format box. To activate this option, you must select any output format other than the default format.
Select this option to enable users to send a report to record contacts. When you select this option, you must also designate a corresponding set of email recipients from the associated list. The record contacts in the list values refer to the contacts for the session application.
List values include:
-
Attach all record contacts:All application contacts and licensed professionals. When you select this option and users run a report, a Send in email button appears on the report preview page. Users select this button to select email recipients.
-
Attach primary record contacts: Application primary contacts and licensed professionals. When you select this option and users run a report, a Send in email button appears on the report preview page. Users select this button to select email recipients.
-
Auto-attach all record contacts: All application contacts and licensed professionals. When you select this option and users run a report, Civic Platform automatically sends an email to application contacts and licensed professionals.
-
Auto-attach primary record contacts: Application primary contacts and licensed professionals. When you select this option and users run a report, Civic Platform automatically sends an email to primary application contacts and licensed professionals.
You can define email subject matter and email content under the EMAIL_REPORT_SUBJECT and EMAIL_REPORT_CONTENT content customize types. This field supports multiple languages. For more information on working with the content customize form, see Customize content of agency communications.
To configure email reports for Citizen Access users, contact the Accela Services Implementation Staff, who can assist in writing event logic for the following scripts: SendReportInEmail-1 and SendReportInEmail-2
Send to printer Select the printer you want to use. Enter a default printer to automatically print the report and notify the user of its completion.
Authorized agents or authorized agent clerks print license tags for their customers in authorized service sales in Citizen Access. To enable agent to print license tags to their local printer, you must select the printer option “Local DataMax-O’Neil E-Class Mark III Printer” for the tag report. You must also associate the report with the Print tag button (portlet name: Button - Citizen Access Tag).
Template Select Browse and choose a report template in Rich Text Format (.rtf). The template can be up to 5MB. This field only applies to RTF report service type. User name Enter the authentication user name.
These fields display only when you select the URL_Report process service and choose the authentication method as Basic authentication or NT authentication. With other process services, Civic Platform configures these fields when you set up the related report service.
-
-
Select Submit to save the report.
-
Select Preview to preview the report. You might be prompted to enter additional required parameters.
-
Add, edit, or delete report parameters if required.