Add built-in menu items to a menu
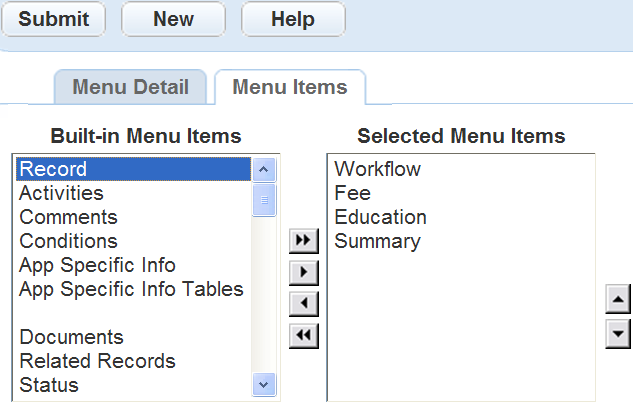
Built-in menu items are the default menu items in Civic Platform. You create a menu by adding and arranging menu items in a list. A menu is complete after you add the menu items, arrange them, and organize them in the list. You add menu items at the same time you create a menu or when modifying existing menus. You can add up to a maximum of 16 menu items to a menu.
To add and arrange built-in menu items to a menu, use the side-to-side and up/down arrow buttons. To move a menu item from the built-in menu item list to the Selected menu items list highlight the built-in menu item you want to move and select the single side-to-side arrow button. The single arrow button moves built-in menu items to the Selected menu items list one at a time. The double arrow button moves all the built-in menu items to the Selected menu items list. When you have added all the menu items you want to display, arrange the order of the Selected menu items with the up/down arrows.
To add menu items to a menu
-
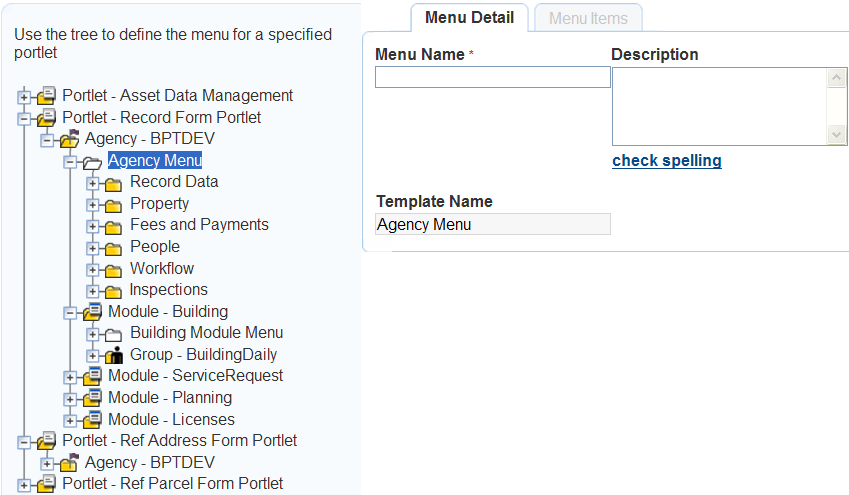
From the Administration menu, select Agency profile > Menu navigation.
-
Expand the folders to the template menu folder level.
-
Select the menu folder you want to add menu items to.
-
Select the Menu items tab.
-
From the Built-in menu items list, select and highlight the menu item you want to add and select the right Single arrow button to move the menu item to the Selected menu items list. To select all the Built-in menu items, select the right Double arrow button.
-
Use the Up/down arrows to select the order the menu items are to display. These buttons only effect the order the Selected menu items display.
-
Select Submit.
Civic Platform confirms you successfully added the menu items to the menu.