Texts and images
You can customize the text on Citizen Access web pages and modify the following: language, page headers, page instructional text, section instructional text, field names, field helper text, check box helper text, hyperlinks in text and within images, radio button helper text, button labels, and body text.
Use the HTML editor
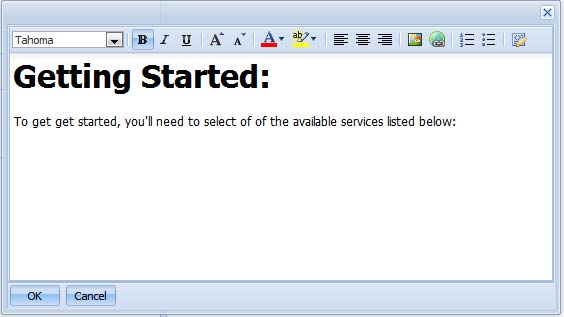
You can modify body text and images by using the HTML editor. Some body text may contain pre-defined variables that are enclosed in the double-dollar signs, for example, $$DueDate$$. You can leave the variables in the body text or remove them using the HTML text editor. Utilize the toolbar to change the font, font color, or appearance of the text. You can apply a highlight, create a hyperlink, change the content, create a bulleted or numbered list, and justify text to display the way you want it. You can apply a stylesheet to the text using the source code button. For more information about how to apply a stylesheet, see Apply stylesheets.
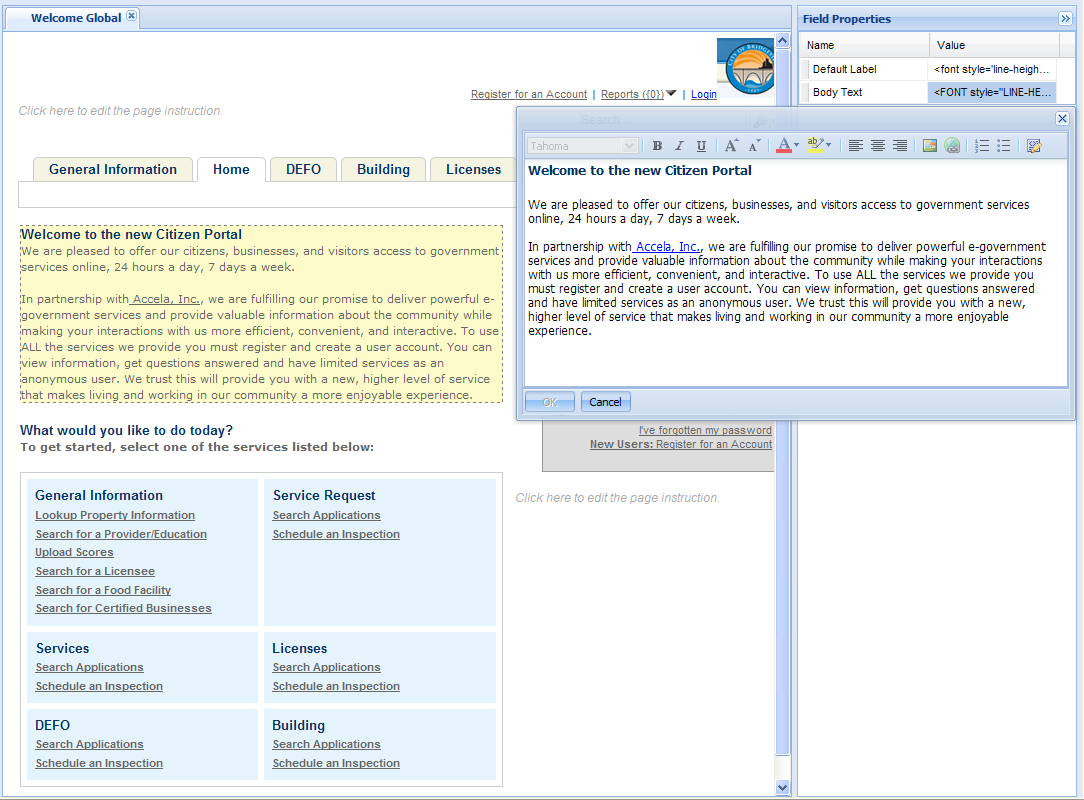
Access the HTML editor by selecting the text or page section you want to modify. Then, double‑click in the Field properties body text value HTML editor window. For example, to place an image and embed a URL within the graphic you click any object, including pages, that has the Body text or Instructions attribute in its Properties panel and use the HTML editor to add the URL location of the image. Note that when embedding an image that links to another page, the image itself is not stored within Citizen Access.
To modify text, hyperlinks, and images using HTML editor
-
Open a web page. Select the text or within the page section you want to modify.
-
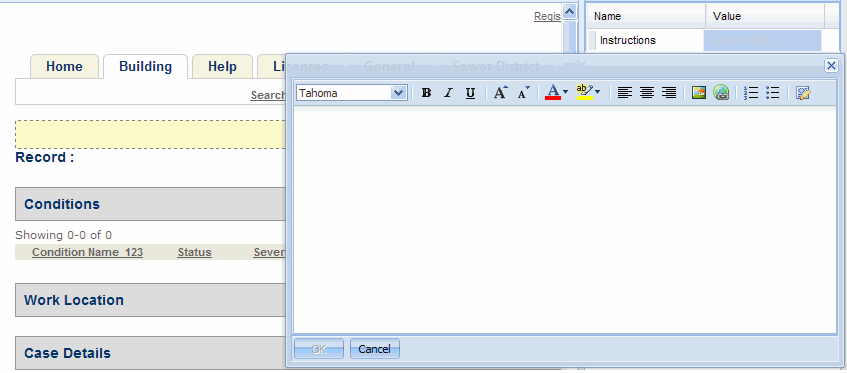
From the Field properties panel, double-click the Body text value field to open the Editor window.
-
Modify content of the web page in the HTML editor. You can add text and images and embed hyperlinks in them. To add an image, follow the substeps below. To set the hyperlink for email, see Configure registration emails.
-
To add an image, set the image for activation by selecting the Image icon.
-
Specify the location of the graphic image file. The image file must be on an accessible server.
-
Select OK to add the image to the page.
-
Select the Hyperlink button to associate a hyperlink with the image.
-
Modify the HTML for the image or the link. For example, you can add a target=“_blank” parameter to the <a> tag. You can add border=“0” to the <img> tag, or you can add an alt=“Link Description” to the <a> tag.
-
Select OK to save changes or select Cancel to exit.
Change text and display with property values
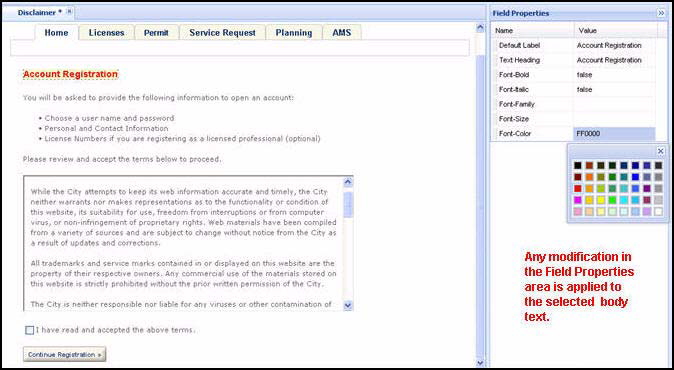
You can customize labels and paragraph text by making modifications to Property values in the right panel of a web page. For example, if you want to provide supportive content for a section, you can add text in the Section instruction value cell. If you want to modify the label of an item, change the text in the Text heading value cell. If you want to change the color, double-click the Font color value cell and choose a color from the color grid. See Apply stylesheets. If you want to configure the initial display of the sections on the Record detail or Review information page, select the header of section, and set the Expanded property of the section to true or false.
Notes:
(1) The standard choice value ENABLE_EXPAND_IN_REVIEW_PAGE in the standard choice ACA_CONFIGS determines whether the sections on the Record review page (excluding the Record type section)s expand or collapse by default.
(2) The Expanded property is unavailable for the Conditions and Conditions of approval sections on the Record detail page.
The Property value settings are used on labels, button text, headers, and hyperlinks. A property value cell may be a list, a text field, or an HTML editor. If a property value cell displays the HTML editor, enter the text or image in the provided space and select OK. For more instructions on HTML editor, see Use the HTML editor.
To customize text using property value cells
-
Navigate to a web page and select the text or the header of a section you want to modify.
-
From the Properties panel on the right side of the web page, select the Properties value cell you want to change.
-
Add section instruction or subsection instructions by adding content in the HTML editor associated with the Section instruction value cell.
-
Use the Section instruction value cell in the Section properties panel for a section.
-
Use the Section instruction value cell in the Field properties panel for a subsection.
-
-
If you want to apply a special property to the text, True applies the Value to the text. False removes the Value from the text.
-
Change the color of text by double-clicking in the Font color value cell to open a color grid for selection.
-
Change the text by selecting the text heading or text label Value cell and typing in the revised text.
-
If you selected the header of a section on the Record detail or Review information page, the Properties panel displays the Expanded cell. Set the cell value to True if you want to expand the section by default. Set the cell value to false if you want to collapse the section by default.
Note: The Expanded property is unavailable for the Conditions and Conditions of approval sections on the Record detail page.
-
-
Select the Save button.
Add instructional text to a web page
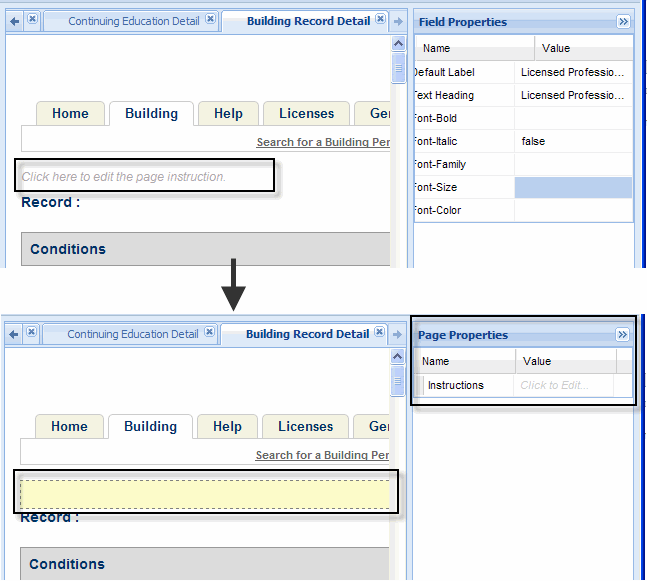
You can add customized instructional text for a web page so that public users have idea of what the web page is for and how to complete it. A web page has two instructional text areas that display the words “Click here to edit the page instruction”, one right above the module tabs and the other one right below the module tabs. To add instructional text, you select either of the instructional text areas, enter content in the HTML editor associated with the Instructions value cell in the Page properties area.
To add instructional text
-
Navigate to a section on a web page.
-
Select the words like Click here to edit the page instruction.

-
Select the Value cell associated with the web page property Instructions.
Citizen Access setup displays the HTML editor.
-
Enter the instructional text and select OK button.
Apply stylesheets
Your agency may use stylesheets, which is a way an agency can define a structured document so that the set of stylistic rules for color, fonts, and layout are consistent. The pre-defined rules in your stylesheet can be applied to body text in Citizen Access. Initial setup requires you to save the stylesheet in the Citizen Access root folder and modify default.master with proper reference to the file that holds your stylesheet. Once the initial setup is complete, you can apply the class definitions to body text using the source edit button. In the example below, the file named demo.cssis the stylesheet.
To apply a stylesheet to body text
-
Define stylistic rules in a stylesheet and save.
For example,
demo.css. -
Go to the root folder where Citizen Access is installed on the IIS server.
-
Copy and paste the stylesheet to the Citizen Accessroot folder on IIS server.
-
From the Citizen Accessroot folder, open the file default.master with a text editor program.
-
Locate the <body> command near the bottom of the page and paste the following line to reference the location of your stylesheet.
<link rel=”stylesheet” type = “text/css” href= <%=Request.ApplicationPath%>/demo.css”/>
-
Save and close.
-
Go to Civic Platform admin and navigate to theCitizen Access admin.
-
Select a web page from the left panel.
-
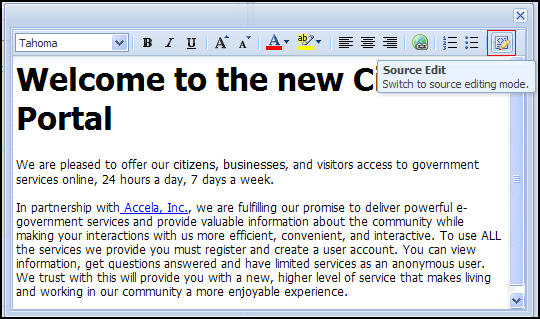
Select the body text you want to apply the stylesheet, and select the field properties body cell to open HTML Editor tool.
-
Select Source edit.
-
Specify your class definitions in the HTML code and save.
Display Citizen Access in international languages
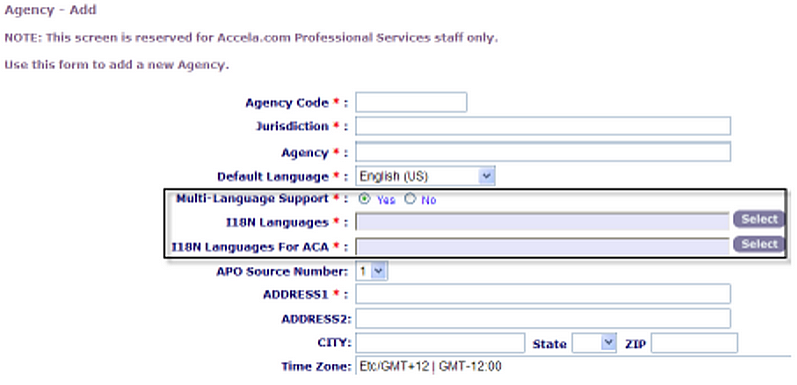
Citizen Access provides support for multiple international (I18N) languages. When you enable multi-language support via the Agency - Add page in Civic Platform, citizens can choose their preferred language in which to view the citizen-facing website.
An Accela Services professional must enable this feature.
To enable multi-language support
-
Navigate to Civic Platform Classic administration
-
Select Administrator tools > Agency profile > Agency.
-
Locate the agency you want to modify.
-
Scroll to Multi-language Support and select Yes.
-
In the I18N Languages for ACA field, choose Select and then choose the languages you want your citizen site to display in.
-
Select Save.