Delegates
You can configure Citizen Access to provide public users with the ability to designate other public users as their delegates and grant the delegates permissions to access their data. Delegates can work on the data based on the granted permissions, such as viewing records, scheduling inspections, creating, renewing and amending records, uploading, downloading and deleting documents, and making payment.
Understand the delegate functionality
You can enable the delegate functionality so public users can designate other public users as their delegates to work on their data based on the granted permissions.
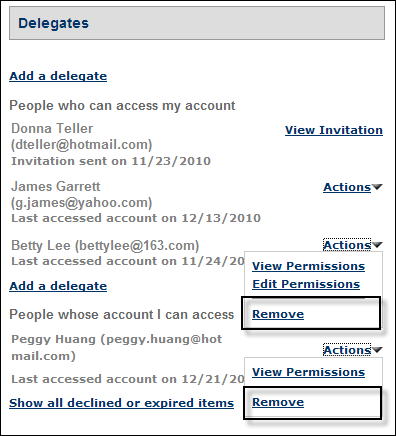
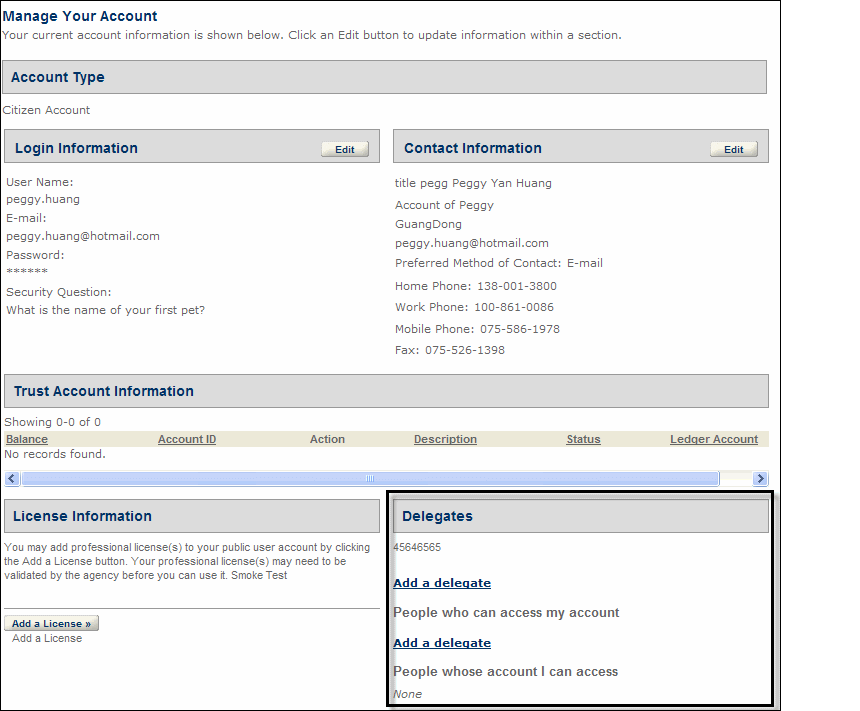
With the delegate functionality enabled, a Delegates section displays in the Account management page in public users’ account. Public users can designate other public users to be their delegates by selecting the Add a delegate link, completing the Add a delegate form and submitting it. In response, Citizen Access sends an email to public users to notify them that they are invited to be delegates. Meanwhile, an invitation is appended to the invited public users’ Delegates section.

The invited public users can accept or reject invitations. When the invited public users accept the invitation, they officially become the delegate of the public users who invited them. The rejected or expired invitation is purged from their account when the invitation purge day arrives. You can configure the invitation expiration day and purge day in the Global settings page. For more details on how to configure invitation expiration day and purge day, see Delegates settings.
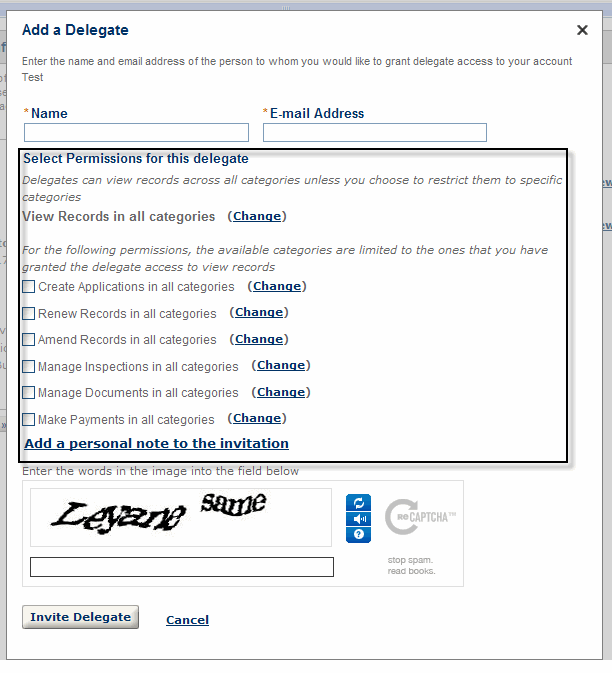
When a public user designate delegates, they can grant them permissions to their data. Public users can grant these levels of permission: view, schedule inspections, create, renew, and amend record, upload, download, and delete documents, and make payments. The access permission that a public user can assign to a delegate is limited to the access right that he/she owns. For example, if a user enables his delegate to create applications in all categories, the delegate can create applications in all the categories that the user himself has access to.
The data that is viewable to delegates displays in the delegates’ account along with their own data. A delegate can work on another public user’s data based on the granted permissions.
Public users can terminate the delegate relationship by removing them from their Delegates section at any time. In this way, the granted permissions are revoked from the delegates, thus the removed delegates can no longer view or work on the data of the public users they act on behalf of.
Implement delegate functionality
This section provides a list of configuration steps to fully implement delegate functionality.
To implement delegate functionality on your site
-
As a prerequisite to displaying the Delegate section in the Account management page in public users’ account, you must enable the Account management functionality. For more information about the Account management, see Enable account management functionality.
-
Configure the related standard choice BATCH_JOB_SERVICE_CATEGORY with standard choice value Proxy user process. For complete information on configuring a standard choice, refer to the Accela Civic Platform Configuration Reference.
-
Schedule a batch job in Civic Platform to set invitations to expired or purge expired or declined invitations from database at the end of the time intervals. For complete information on creating a batch job, refer to the “Batch Engine” chapter of the Accela Civic Platform Administrator Guide.
-
Enable the delegate functionality to allow public users to manage their delegates in ACA. For more information about the configuration, see see Delegates settings.
-
Customize the content of the delegate notice email by navigating to Administration > Setup > Communication manager > Notification templates.
When an Add a delegate form is successfully submitted, Citizen Access sends an email to the delegate’s email address specified in the Add a delegate form notifying that a public user invites them to be their delegate.
-
Configure the Manage delegate page located in the Delegate folder in the General pages area. For customization steps, see Web pages.