Create, edit, update, and delete checklists and checklist items
A checklist is a series of checklist items that inspectors follow and complete when doing an inspection. Checklists allow inspectors to review the checklist items during inspections and then score the item according to compliance requirements. There are many ways to configure checklists and modify them to your specific needs.
You can create checklists and add them to your system as necessary. Users can choose from any checklists defined on your system to help them complete a certain inspection or document review. When you add a checklist, you must set up the values you to appear in the individual checklist items. For instructions, see Add a checklist item to a checklist.
To create a checklist
-
From the Administration menu, select Inspection > Checklist.
-
Select Create checklist.
-
Enter the name of the checklist in the Checklist name field.
-
Select Save.
If you no longer want users to follow a certain checklist when recording inspection or document review results, you can delete it from your system.
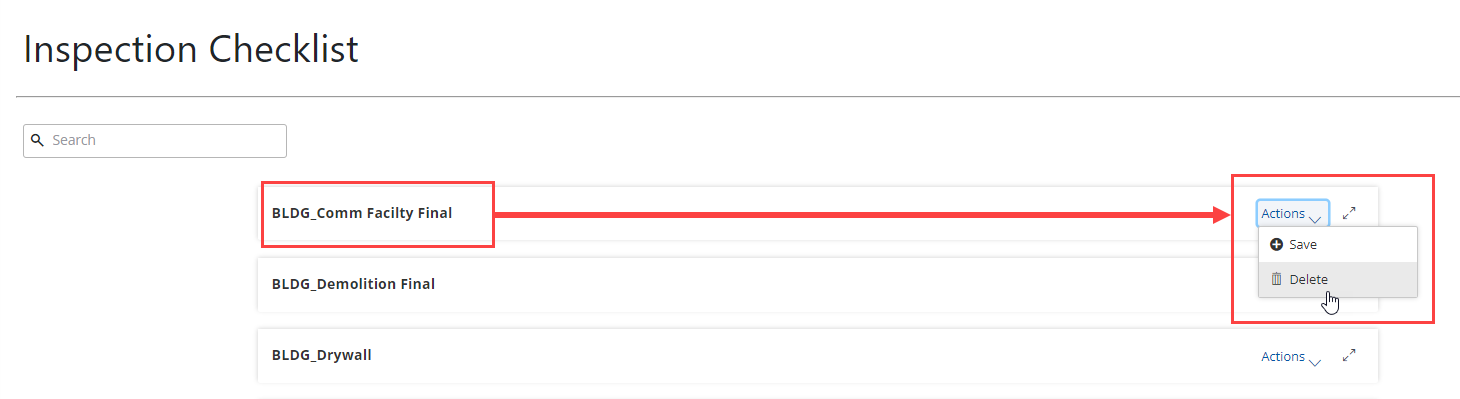
To delete a checklist
-
From the Administration menu, select Inspection > Checklist.
-
Find the checklist you want to delete and select Actions > Delete from the right of the checklist.
-
Select Yes to confirm the deletion.
After you create a checklist you can determine the sequence order of checklist items; add title (guide text) for the user; set defaults for comments, statuses, and scores; and set a points threshold for inspections. To change a checklist item, see Update a checklist item.
To add a checklist item
-
From the Administration menu, select Inspection > Checklist.
-
Select the checklist that you want from the list of checklists
Note: You can filter the checklist results using the Search field.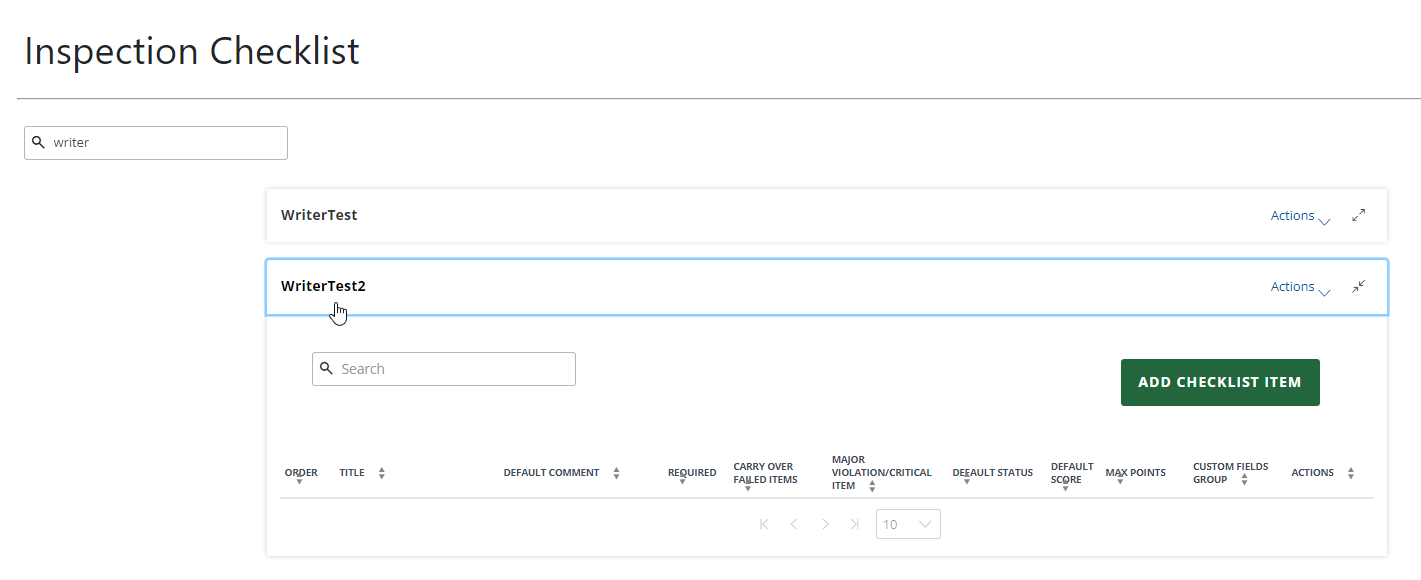
-
Select Add checklist item.
-
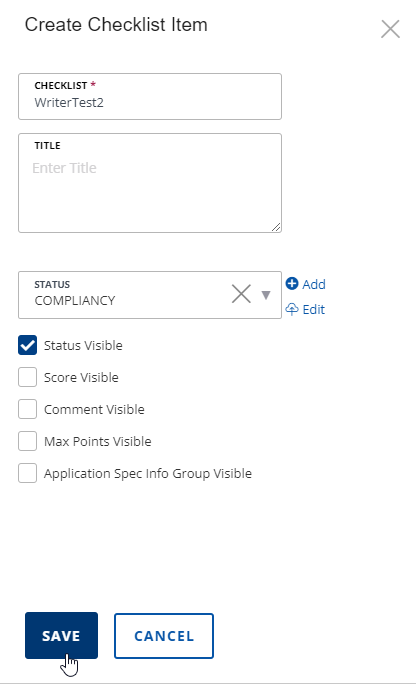
Complete the following checklist item options, as necessary.
Option Action Title Enter the details about the item as you want it to display to users. You can use this text to ask a question or provide instructions.
Example: You can ask the inspector whether the builder used approved building materials.Status Select a status group from the list menu.
You can also select Add or Edit to add a new status group or edit the selected status group. For more information, see Add or edit checklist status groups.
Status groups allow you to choose the values that users see in their status list menu.
Status visible Select to display the status list menu to the user. Score visible Select to display the score value to the user. Comment visible Select to display the comment box with your comments to the user. Max points visible Select to display the Max points column on the Admin checklist item and Daily checklist detail pages to the user.
Note: If you select this option, you must also select the Score visible option.Custom fields group visible Select to have the application-specific information group fields display on the Admin checklist item and Daily checklist detail pages.
For more information, see Associate custom fields groups to checklist items.
-
Select Save.
-
Repeat steps 3-5 for each checklist item you want to add.
After you create a checklist item, you will update the checklist item to set the display order of that checklist item, set the default status, and select more options for that checklist item.
To update the checklist item
-
From the Administration menu, select Inspection > Checklist.
-
Select the checklist with the checklist item you want to update.
-
Either:
-
Select the
 icon in the Order column next to a new checklist item.
or
-
Select the number link in the Order column next to a previously created checklist item.
-
-
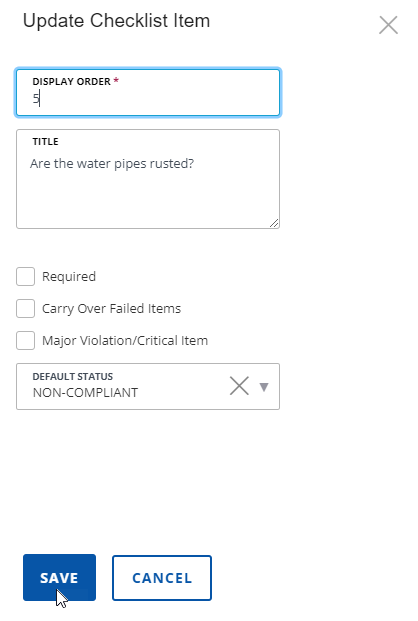
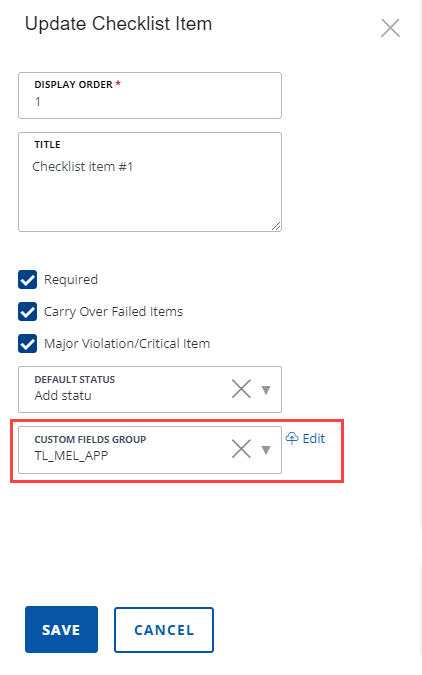
Enter a number for where this checklist item will display in conjunction with the other checklist items.
-
Select the following options you want to activate.
Option Description Required Select to make the checklist item required in the checklist.
Notes:
-
During inspections, inspectors must specify the status and score for every required checklist item in a checklist to complete the checklist.
-
During document reviews, reviewers must complete all the required checklist items in a document review task (that is, set their statuses to an Approved result type) before updating the task to a status that the standard choice for the document review status group specifies as validation required.
Carry over failed items Select to move the checklist item automatically to a new checklist if it fails (that is, the user results the item with a denied status).
Notes:
-
If the item fails in a checklist for an inspection, the item is transferred to the next inspection(s) that users schedule on the record (in either Civic Platform or Citizen Access).
-
If the item fails in a checklist for a document review task, the item is transferred to the document that users resubmit.
Major violation/critical item Select to display the Major violation check box for the checklist item.
Notes:
-
If the user selects a status for a Major violation/critical item” checklist item, Civic Platform applies the critical score of the status for the checklist item.
-
If the user selects a status for a checklist item that is NOT a Major violation/critical item checklist item, Civic Platform applies the non-critical score of the status for the checklist item.
-
Civic Platform automatically assigns the Major violation status for the checklist item, only when you select a Major violation status for a Major violation/critical item checklist item.
-
-
Select the Default status for this checklist item.
-
Select Save
Note: The Display order field is required. You cannot save the checklist item if the Display order field is blank.
You can edit checklist items after they have been created. This allows you to make changes that affect the checklist item and the overall checklist.
To edit a checklist item
-
From the Administration menu, select Inspection > Checklist.
-
Select the checklist with the checklist item you want to edit.
-
Select Actions > Edit configurations from the Actions column to the right of the checklist item.
-
Update the following checklist item options, as necessary.
Option Action Title Enter the details about the item as you want it to display to users. You can use this text to ask a question or provide instructions.
Example: You can ask the inspector whether the builder used approved building materials.Status Select a status group from the list menu.
You can also select Add or Edit to add a new status group or edit the selected status group. For more information, see Add or edit checklist status groups.
Status groups allow you to choose the values that users see in their status list menu.
Status visible Select to display the status list menu to the user. Score visible Select to display the score value to the user. Comment visible Select to display the comment box with your comments to the user. Max points visible Select to display the Max points column on the Admin checklist item and Daily checklist detail pages to the user.
Note: If you select this option, you must also select the Score visible option.Custom fields group visible Select to have the application-specific information group fields display on the Admin checklist item and Daily checklist detail pages.
For more information, see Associate custom fields groups to checklist items.
- Select Save.
You can delete an unwanted checklist item from a checklist at any time. This allows you to remove outdated or duplicate checklist items.
To delete a checklist item
-
From the Administration menu, select Inspection > Checklist.
-
Select the checklist with the checklist item you want to delete.
-
Select Actions > Delete from the Actions column to the right of the checklist item.
Important: There is no confirmation dialog when you delete a checklist item. When you select Delete, the checklist item is immediately removed.
The Display order field allows you to set the order that the checklist items appear during an inspection. This allows you to create a logical order of checklist item for your inspectors to follow.
To set the display order
-
From the Administration menu, select Inspection > Checklist.
-
Select the checklist with the checklist item for which you want to change the order.
-
Select the number link in the Order column next to the checklist item.
Note: Linked numbers only display in the Order column after a checklist item has been updated. For more information, see the Update a checklist item section above. -
Change the number for where this checklist item will display in conjunction with the other checklist items.
-
Select Save.
Checklist status groups allow you to have more than one set of status values for users to choose from when they complete a checklist. You can set up any number of statuses and group them together.
The status is like a disposition, or result, for a particular checklist item. You can assign scores to statuses. When users select a status for a checklist item, the score of the status automatically fills in the score of the checklist item. You can set a status as a major violation. When users select a major violation status for a Major violation/critical item checklist item, the number of major violations in an inspection increments by 1.
To create or edit a checklist status group
-
From the Inspection checklist page, add or edit a checklist item. (For more information on adding or editing checklist items, see the add or edit checklist items section above.)
-
Either:
-
Select Add next to the Status menu.
or
-
Select Edit next to the Status menu, and select a status to edit from the Status column.
-
-
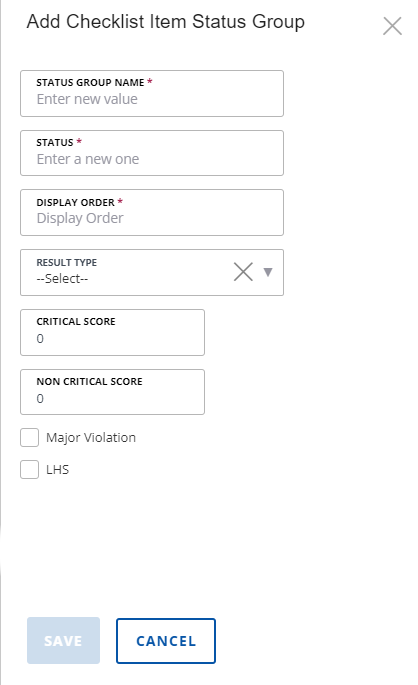
Add or modify the following fields.
Field Action Status group name Enter a name for the status group.
Note: You can reuse checklist item status groups, so create an easily identifiable name.Status Enter the name of the status. What you enter here displays as a choice in the list of statuses for this checklist item. Users can choose this status from a list of values when completing a checklist.
For more information, see Checklists for inspections.
Display order Enter a number to indicate the position of this status within the list. Result type Select a result type.
There are three result types:
Approved: Approves (passes) the checklist item.
Denied: Denies (fails) the checklist item.
Informational: Indicates that the checklist items do not need a status of approved or denied, but the agency wants to collect information in the checklist for that inspection.
Critical score Enter the critical score for the status.
Note: If a checklist item is a Major violation/critical item in the reference checklist, when users select a status for the checklist item, the critical score of the status automatically fills in the score of the checklist item.Non-critical score Enter the non-critical score for the status.
Note: If a checklist item is not a Major violation/critical item in the reference checklist, when users select a status for the checklist item, the non-critical score of the status automatically fills in the score of the checklist item.Major violation Select to designate the checklist item as a major violation.
Note: If a status is a major violation, when users select the status for a “Major Violation/Critical Item” checklist item, Civic Platform automatically selects the Major violation check box for the checklist item.LHS Select to designate the checklist item as LHS (Life/Health/Safety).
Note: For LHS-type items, the maximum point value becomes the default score. Inspectors can edit the number. -
Select Save.
Note: After adding or editing a status group, you associate the new or edited status to checklist items using the Status menu.
Administrators can customize checklist item templates by associating the item with a custom fields group. Checklist items are the actual specifications on a checklist.
When you attach a custom fields group to a checklist item, the information determined within the custom field displays on the checklist as an additional field.
With this feature, you can use custom field and custom list definitions for checklist items such as fields, lists, and check boxes. Custom fields add a single line to the checklist item, and custom lists add multiple options. This enables you to associate the custom fields group code to a record type or checklist item. You can arrange these custom fields items according to your agency's preferences with the Form layout editor.
To associate a checklist item template to a Custom Fields group
-
From the Inspection checklist page, add or edit a checklist item. (For more information on adding or editing checklist items, see the add or edit checklist items section above.)
-
Select the Application spec info group visible box and select Save.
-
Either
-
Select the
icon in the Order column next to a new checklist item.or
-
Select the number link in the Order column next to a previously created checklist item.
-
-
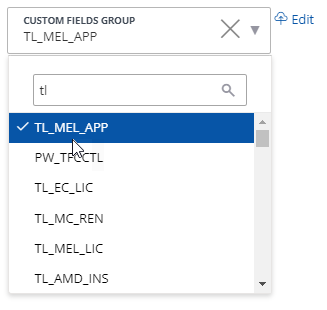
Select the Custom fields group menu.
-
Either:
-
Enter the name (or partial name) of the custom fields group you want to associate to this checklist item.
or
-
Scroll to the custom fields group you want to attach to this checklist item.
-
-
Select the custom fields group you want to associate with the checklist item.
-
Select Edit and modify the custom fields group as necessary.
-
Select Save.
-
Select Back to inspection checklist to return to the Inspection checklist page.
-
Select Save.