Design form layouts
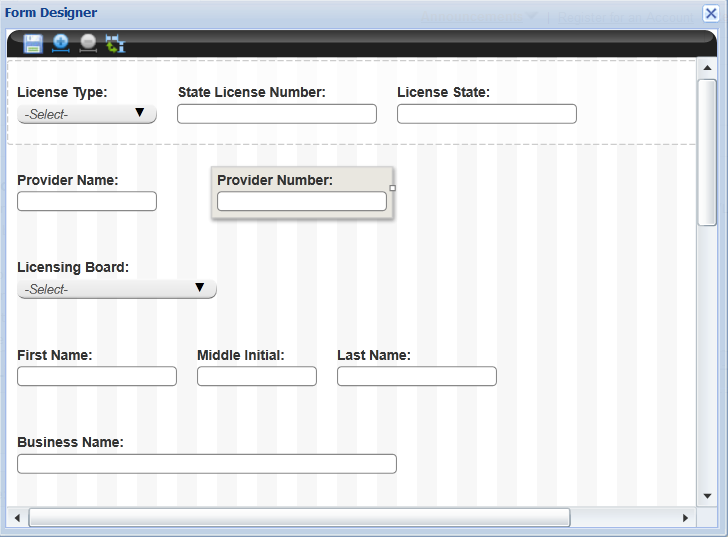
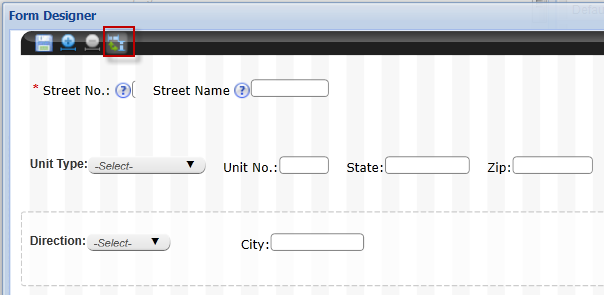
You can define custom layouts for forms displaying to public users with Citizen AccessForm designer. The Form designer displays numerous columns as a guide for aligning the fields and elements on a form. Administrators rearrange those displayable fields and elements in width and placement, or change the position of the labels to the top or left of the fields. Form designer applies to the application intake form, the General search and Search by address sections of the Record home page, the Contact information section of the Enter information page, the Look up by address, Look up by parcel information, and Look up by owner sections of the APO search page, and the Licensee detail page.
You can also customize field labels and grouped elements to display vertically or horizontally on the form to create the desired look. For example, administrators can define a group of application-specific information radio buttons to display in a vertical column or as a horizontal row of radio buttons across the page.
The Form Designer enforces rules to maintain the integrity of spacing and standards for form layouts. For example, the Form Designer provides an automatic minimum space definition to prevent the overlap of fields or elements on a page. If you place a field or element too close to another element or field, the form designer automatically shifts the adjusted field or element to the nearest placement on the form based on the minimum space requirement.
This section provides the instructional text associated with the Form designer so you can successfully launch the design tool and perform tasks for form customization.
Topics
Launch Form designer
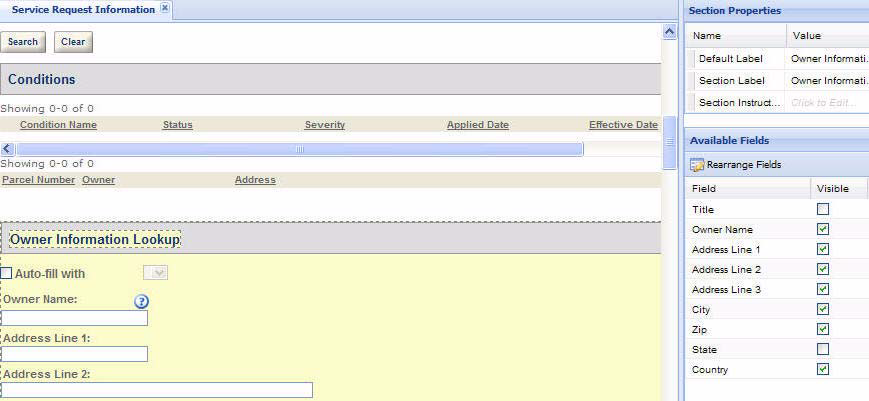
Citizen Accesssetup provides a Section properties section in the right panel to allow customization to sections on a web page. For example, you can define section labels and configure which fields display and require data before submission. It is within the section properties configuration area where you can locate the Rearrange fields button to access the Form Designer. This section provides the instructional text to help you launch the Form Designer so you can customize the placement and sizing of fields on the form.
To launch form designer
- Navigate to the web page with the form requiring customization. For example, <Module> Information page.
-
Search and select the section requiring customization.
Citizen Access setup displays the section properties area in the right panel.
- Select the Rearrange fields button located in the Available fields section of the Section properties panel.
Adjust the placement of fields
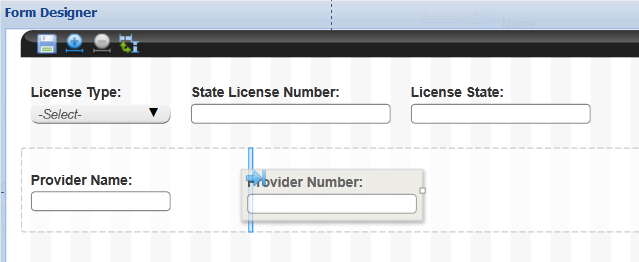
You can adjust the placement of displayable fields and elements by dragging and dropping them into a new or existing form row. Select each field or element, one-at-a-time, and move them to the desired location.
The Form designer enforces an minimum space definition to prevent the overlap of fields or elements on a page. If you place a field or element too close in proximity to another element or field, the Form designer will automatically shift the adjusted field or element to the nearest placement on the form row based on the minimum space rule. This may result in an auto-shift of other fields or elements to accommodate the adjusted field. For example, if you move a text field into an existing form row and drop it in between two fields, the Form designer will auto adjust the spacing between the fields so at least the minimal space requirement separates each one from the other. If the row cannot accommodate the field size in length, the Form designer will prevent you from dropping the field into the location until the size is adjusted. For instructions on how to adjust the size of a field, see Design form layouts.
To adjust field placement on a form
-
Launch the Form Designer associated with the form requiring customization. For more information, see Launch Form designer.
-
Select the field or element you want to move.
-
Move the field or element into the desired location by doing one of the following:
-
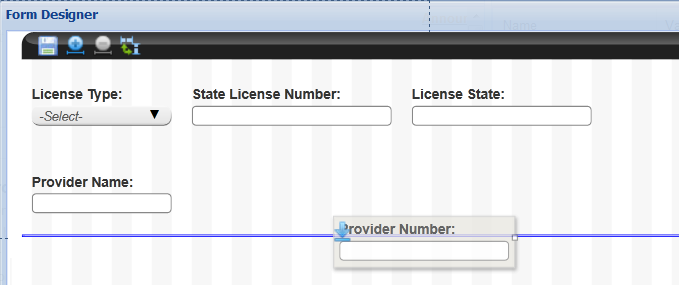
Drag and drop the element into an existing row.
-
Insert the field or element in a new row by dragging and dropping it into the blue line that displays between rows to create the desired effect.
-
-
Select the Save button at the top of the page to save changes.
-
Select X at the top of the page to close the Form Designer. See Design form layouts.
Adjust label position
You can adjust the field labels to be displayed on the top or left of the fields.
To adjust the label position
-
Launch the Form Designer associated with the form requiring customization. For more information, see Launch Form designer.
-
Select the Switch label position icon in the tool bar at the top of the Form Designer.
Citizen Access setup displays the labels to the top of the fields (if currently on the left) or to the left of the fields (if currently on the top). Select again to switch back.
-
Select Save to save changes.
-
Select X at the top of the page to close the Form Designer. See Launch Form designer.
Adjust the size of fields
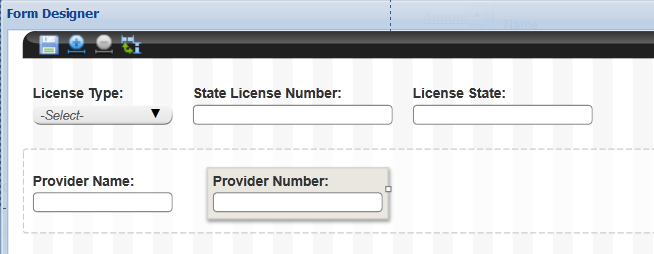
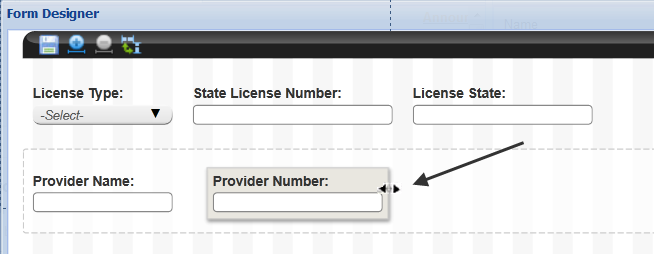
You can adjust the size for each field or field element so that it extends to the desired length in a form row. Select the field requiring size customization and use the adorner for extending or shortening the field size. The Form Designer will adjust the spacing between form fields or elements to prevent overlap.
To adjust the size of fields
-
Launch the Form Designer associated with the form requiring customization. For more information, see Launch Form designer.
Citizen Access setup displays the Form Designer with displayable fields on the grid.
-
Citizen Access activates the element and provides an adorner as a visual indication that it is ready for configuration.
Select the field or element you want to re-size.
-
Drag and drop the adorner to define the location of the desired width for the field or element.
-
Select the Save button at the top of the page to retain changes.
-
Select X at the top of the page to close the Form Designer.
Customize application-specific information layouts
Citizen Accessand Civic Platform provide you with the tools to create custom layouts for application-specific information. This includes the ability to add and customize instructional section text, field helper text, field watermark text, label positioning, and field label customization. Determine the vertical or horizontal arrangement of radio buttons. You can create a one-column or two-column layouts and group ASI information associated with page flow configuration. For more information, see Configure application-specific information. For more information about the ASI layouts, see “Designing ASI Layouts for Citizen Access” in the section Application Specific Information in the Accela Civic Platform Administrator Guide.