Fields
Citizen Access provides you with the tools to create and customize fields so your web pages can be designed to be intuitive for public users. This section provides you with the instructional text associated with the tasks and configuration of fields, such as setting which fields to display, configuring required fields, hiding field content, and customizing labels, helper text, and watermark text. The modifications and supportive text for fields are supported in a multiple language environment. For example, your agency can provide supportive helper text or watermarks in Arabic.
If the fields are application-specific information fields and require a custom layout, refer to Customize ASI field label text.
Topics
Customize field labels
You can customize labels and paragraph text by modifying property values in the right panel of a design web page. For example, if you want to change the label of an item, change the text in the Text heading value cell. If you want to change the color, double-click the Font color value cell and choose a color from the color grid. See Fields.
The Property Value method of customizing text is used throughout ACA for labels, button text, headers, and hyperlinks. Select the field label text you want to modify. Then, use the drop-down lists to choose the value you want to apply to it. True indicates applying the property value to the text and false indicates not applying the property value to the text. If you want to customize the labels for application-specific information fields, refer to Customize ASI field label text.
To customize a field label
-
Navigate to a web page and select the text you want to modify.
-
From the Properties panel on the right side of the web page, select the Field properties value cell you want to change.
-
Apply a text field property using True or False. True applies the property to the field. False does not apply the value to the field. For example, Font Italic Value cell True and Font-Bold value cell False would set a non-bold italic font.
-
Change color by double-clicking in the Font color value cell to open a color grid for selection.
-
Change the text by selecting the Text label value cell and typing in the revised text.
-
-
Select Save.
Hide field content
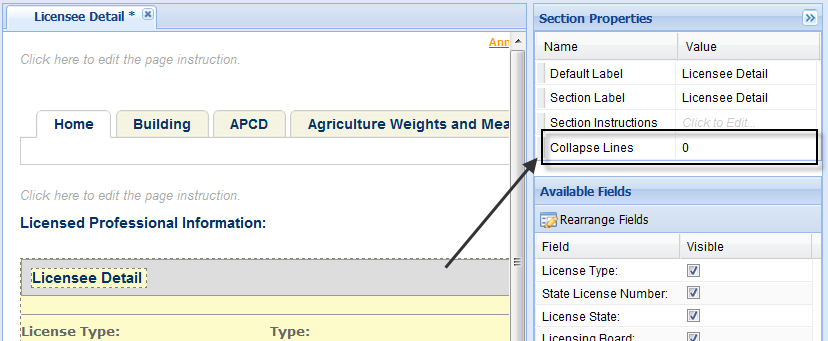
You can specify the maximum number of lines of content of a field to be displayed on page. The exceeding lines of content are hidden from page. Users can click the Show more link to show the full content. This feature only applies to the template fields on the Licensee detail page.
To hide field content
-
Navigate to the Licensee detail page.
-
Select the Licensee detail section header.
-
Locate the Collapse lines field in the Section properties panel and enter a positive integer into the Value text box.
By default it is set to blank (null), which means displaying full content on the page. Enter a positive integer to display the number of lines of the field content and hide the exceeding lines.
-
Select Save.
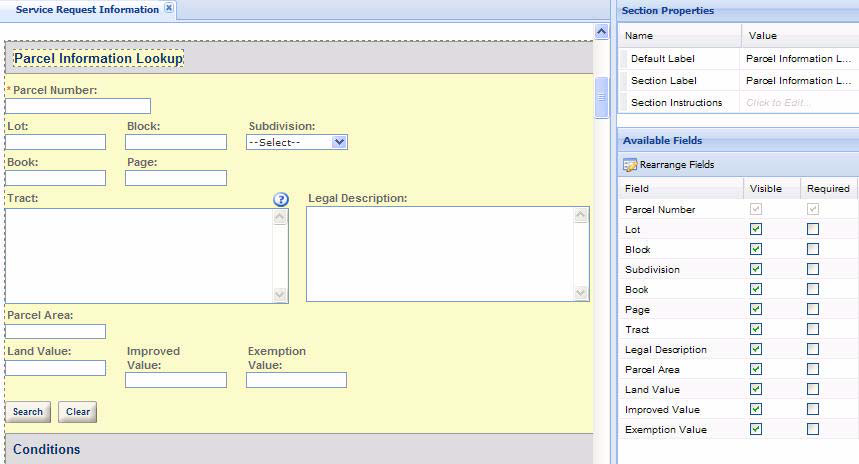
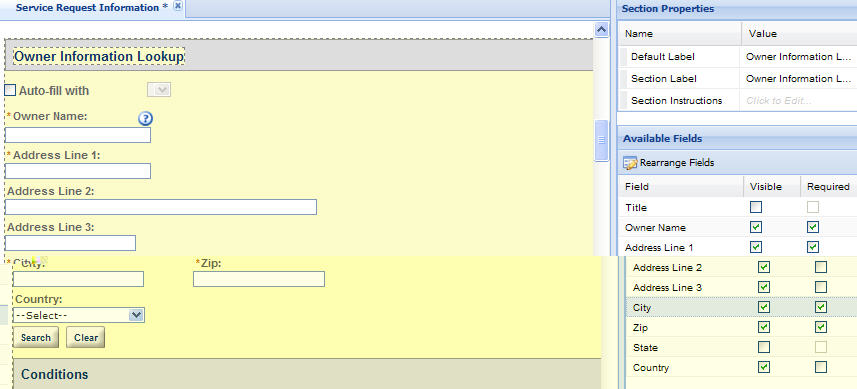
Define visible and required fields
You can add or remove fields from sections on a web page. Select a section of a web page by double-clicking the gray header. The section and associated fields displays in yellow workspace. An available fields section also displays in the right panel. Mark or clear the check boxes next to the fields you want to show or hide on the web page.
The check boxes are inactive if a field is required in order to submit the form. You cannot disable any of these required fields. You can set additional required fields for Citizen Access users. These required fields display in the Contact information section of the Register account form, Examination form, the Education form, and the Continuing education form, and these sections of an application or attachment:
-
APO (Address, Parcel, Owner)
-
Licensed professional
-
Contact
-
Additional information
-
Detail Information
-
Work location
You can also define the required fields for the Enter work location section of the Search service page.
To set field display and required functionality
-
Navigate to a section of a web page.
-
Select the section to activate it for configuration.
-
Go to the Available fields list and do the following tasks:
-
Select the Visible check box next to the field you want to display on the form.
-
Select the Required check box next to the fields that require data for submission.
-
-
Select Save.
Add helper text
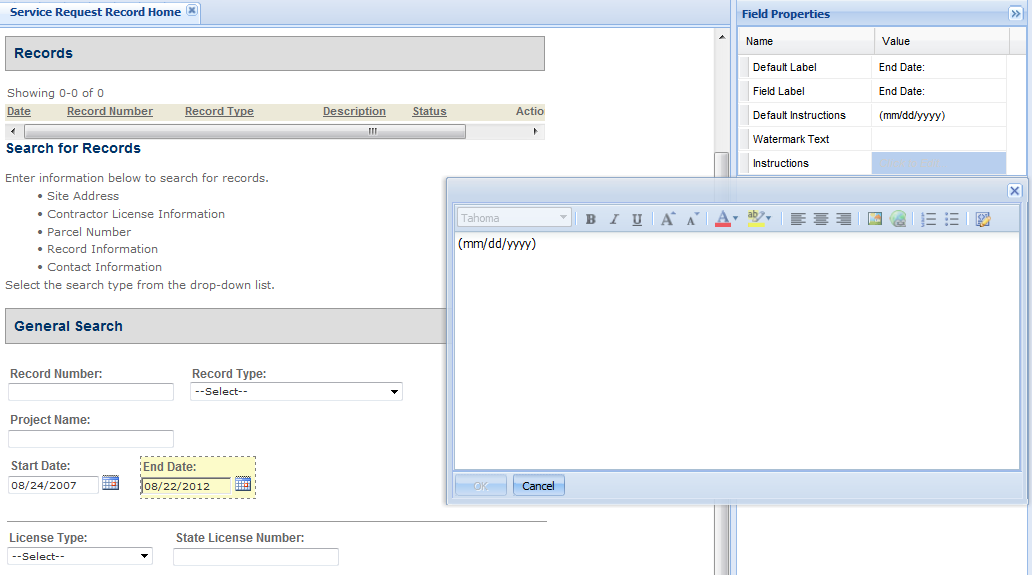
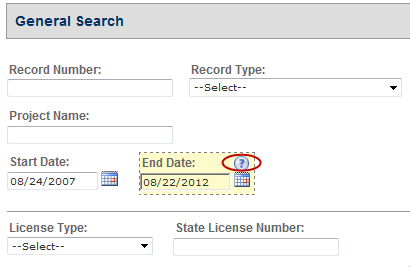
You can add customized helper text for a field so that public users have instructions on how to complete the associated field. In essence, it is a custom help topic for the field. After helper text is defined for a field, Citizen Access displays a blue question mark with the field as a visual indication to all users that helper text is available. To add helper text, enter content in the HTML editor associated with the Instructions value cell in the Field properties area.
If you want to provide instructional text to support the tasks in a section of a web page, add the content using the HTML editor associated with the section. Refer to Fields for additional information.
If you want to provide instructional text to support the fields associated with application-specific information or application-specific information tables, refer to Fields.
To add helper text
-
Navigate to a section on a web page.
-
Select the field that requires helper text customization.
-
Select the Value cell associated with the field property Instructions.
-
Enter the instructional helper text and select OK.

Add a watermark
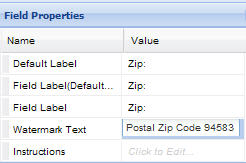
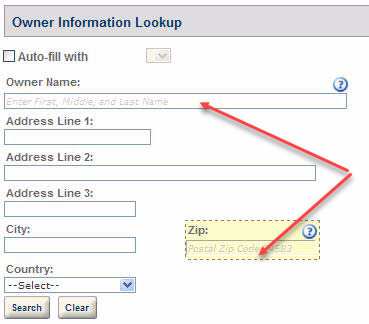
You can add a watermark to the white space in a text field as a way to provide an example or brief instructions for completion. Watermark text displays in gray and disappears as soon as the user enters information in the field. For example, watermark text in a date field can be used to tell the user the date format for entry, such as mm/dd/yyyy. Enter watermark text in the Watermark text value cell in the field properties area.
To add watermark text in a field
-
Navigate to a section on a web page.
-
Select the field that requires a watermark.
-
Select the Value cell associated with the field property Watermark text.
-
Enter the watermark content text in the Watermark text value cell.
Adjust field size and placement
You may have the ability to alter the positioning and size of a field on a form. This is done using Citizen Access Form designer tool. For more information about Form designer, see Fields.
Display action items as icons
You can configure the standard choice value, POP_ACTION_ITEM_STYLE of the standard choice ACA_CONFIGS to control whether users must select a drop-down button in the Action field to access the action items, or whether they can directly select an action item in the Action column. If you set the standard Choice value to ICO, the action items directly display in the Action column as icons, as shown in Fields. If you do not define the standard choice value, the action items display in a list, as shown in Action items in drop-down.
![]()

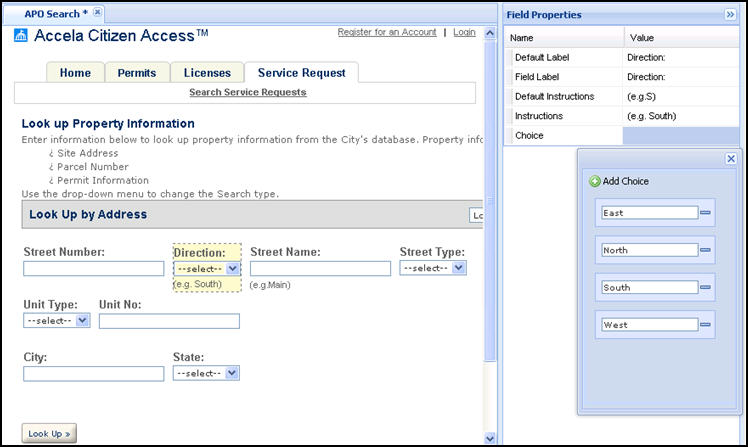
Add or remove drop-down list choices
You may add, modify, or remove items from drop-down lists in Citizen Access.
To add or remove drop-down list choices
-
Select a drop-down field.
-
Select the Field property choice value cell to display the choices.
-
Select the green plus sign to add a choice.
-
Select the blue minus sign next to a choice to remove it.
-
Save all changes.
Note: Please note that if you remove an option from a drop-down list, the associated Standard Choice for the drop-down list is also changed.