Columns on a page
Customize the placement and width of columns on web pages to set the look and display order of lists in Citizen Access setup.
Define column placement
Determine the display order for columns in a list by dragging and dropping a column header in the desired location in the list. The column order from left to right is directly related to the column header placement from top to bottom in the Section properties area.
To arrange columns in a list
- Navigate to a web page with a list.
- Select the section list with column headers that require re-arranging. For example, the Education list on the Record detail page.
-
Configure which column headers you want to display in the list table.
- Select the check box next to the column headers you want to display.
- Clear the check box next to the column headers you want to hide.
-
Configure the column positioning by moving the available column headers to the desired location in the section list.
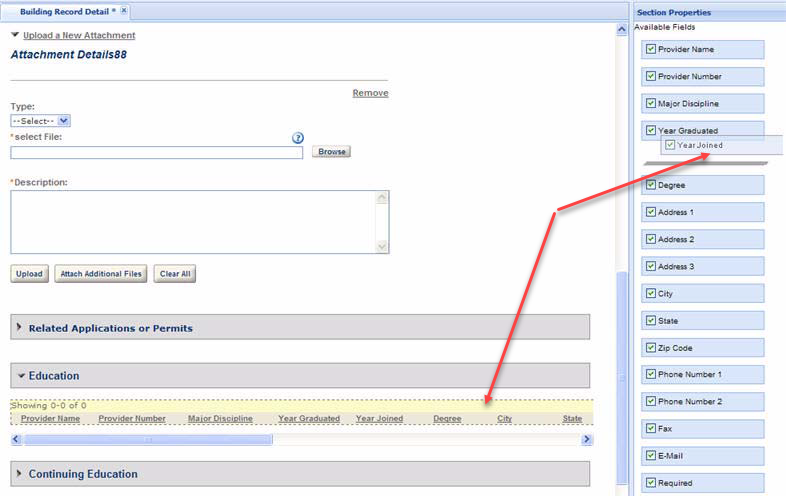
- Move a column header up towards the top of the available fields list to move it left in the table.
- Move a column header down towards the bottom of the available fields list to move it right in the list table.
Set column widths
You can define the column widths on web pages containing lists. This is useful so that you can adjust the column width to accommodate a long column header title or to allow more space for the information that populates the column so it displays in full view to public users.
Set the column width configuration by navigating to a web page, selecting the column header, and defining the width in the Field properties area.
To set a column width
- Go to a web page with a column header. For example, the Record detail page in a module.
- Go to a section and expand the view to display the list format. For example, the Attachments or Education section.
-
Select the column header you want to modify.
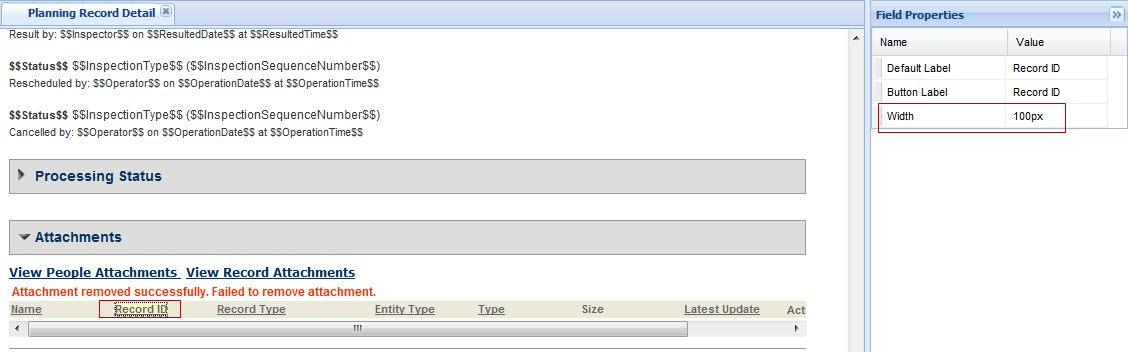
- Set the value for the column width in pixels.
- Set other column configurations in the Field properties area as needed. This includes modifying the label or applying a Record type filter.
- Select Save.