Configure the contact pages in account management
The Contact information section in account management displays the list of contacts that public users already associated with their account. Public users can select Add a contact to add more contacts, or select the View action link on a contact to view the contact details. The windows that display then guide public users through the process.

To customize the contact pages during account management
-
Go to the General tab, and select the Contact folder under Account management.
-
Customize the field label, field size, and add a watermark or instructional text functionality of the following pages:
-
Select Contact type
The Select contact type window displays when public users select Add a contact in account management.
When configuring the Select contact type window, you can use the Type options for the Type field to set applicable reference contact types for public users. If you select only one reference contact type for the Type field, the Type field in Select contact type directly displays the contact type as its value.
Note: If public users open the Select contact type window in which the Type field only has one applicable contact type, the expressions configured to be fired upon contact type change do not work. -
New contact
The New contact window displays after public users select a contact type.
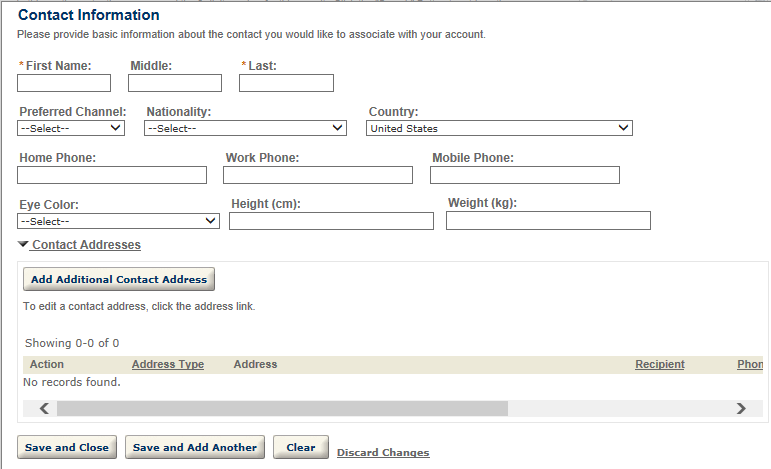
When public users select the Save and close button, Citizen Access returns to the Account management page. When public users select the Save and add another button, Citizen Access stays at the New contact window. If there are close matching reference contacts for the entered contact, Citizen Access directly replaces the entered contact with the first reference contact that meets the close matching criteria of the highest priority.
-
Contact information
When public users select View action on a contact in account management, Citizen Access navigates to the Contact information window.
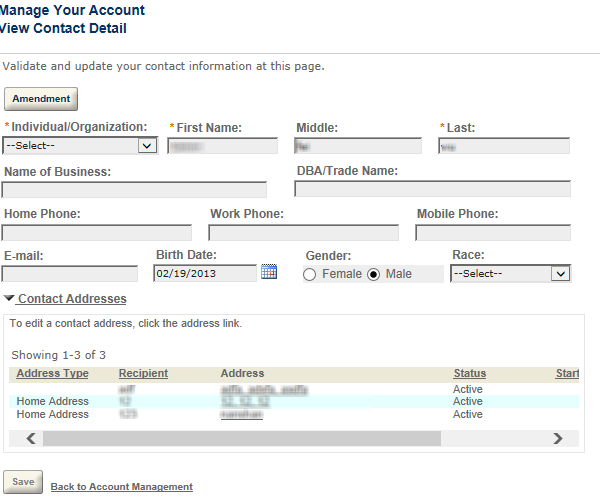
To enable public users to apply for updates of the read-only contact information, you can associate the Amendment button with a record type filter which defines a group of record types.
-
Select the Amendment button.
-
Select a record type filter from the Record type filter value list in the Field properties panel.
The Amendment button is associated with a record type filter and becomes available to public users on the Contact information page. They can select the Amendment button to submit an application that the record type filters to update the read-only information of the selected contact. The selected contact information auto-populates in the first contact section of the Amendment intake form.
-
To disable contact amendment application, select the Amendment button, then leave the Record type filter list blank. The Amendment button is unavailable to public users on the Contact information page.
-
-
Contact address info
If you configure the standard choice ENABLE_CONTACT_ADDRESS to enable the contact addresses as part of the contact information, the Contact address info window displays from the New contact window or Contact information window when public users edit a contact address, or add a new contact address.
-
-
Customize the contact fields as necessary in the New contact page and Contact information page:
-
Remember to select the target contact type first if you want to customize the field settings. The customized settings only apply to the selected contact type. If you define the field settings without selecting any contact type, the New contact or Contact information window displays the default field settings.
Note: The contact types which are not selected in the Type option settings are unavailable to public users. If you customize the field settings on a contact type which you do not select in the Type option settings, the field settings do not take effect. -
Configure the availability of the fields.
-
Invisible fields for confidential contact information that you do not want to disclose to the public.
-
Editable fields for the common contact information that you want public users to timely update.
-
Read-only fields for the shared, critical contact information that you prevent public users from direct editing without prior application.
-
-
-
Configure the contact and contact address identity settings if necessary. With the identity settings, both Civic Platform and Citizen Access forbid public users from adding duplicate contacts and/or duplicate contact addresses. For more information on identity settings, refer to the “Managing Contact Identity Settings” section in the “People” chapter of the Accela Civic Platform Administrator Guide.
-
Enable the contact address validation feature if applicable to your agency.
-
If you want to validate certain contact addresses against external address source, configure the standard choice ENABLE_CONTACT_ADDRESS_VALIDATION, CONTACT_ADDRESS_TYPE and EXTERNAL_CONTACT_ADDRESS_SOURCE_[SOURCE Name]. For information on configuring the standard choices, refer to the Accela Civic Platform Configuration Reference.
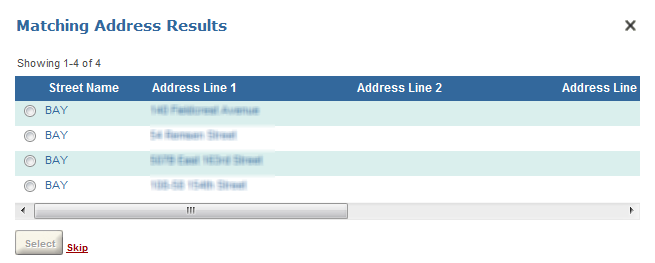
You can customize the pop-up page that public users view when they select the Save address button to save a contact address that requires validation for their account.
-
Go to the General tab, and customize the Validated Contact Address page under Validated address.
Public users can either select a matching address, or select the Skip link to create a new address instead.
The Validated field value of a contact address displays the validation status:
-
Null or empty: Civic Platform did not validate this contact address.
-
No: Civic Platform validated the contact address, but the validation failed.
-
Yes: Civic Platform validated the contact address, and the validation passed.
Note: You can clear the Enable contact address modification option to make sure public users do not edit validated contact addresses. -